Football Table Vision
Building the Vision GUI
In order to build the Vision GUI, you need to install qtcreator and the opencv libraries
sudo apt-get install qtcreator

sudo apt-get install libopencv-dev
This tool runs on both x86 and x86_64 systems, however it is compiled against static libraries from Prosillica. These static libraries have to be specified in the Qtvision.pro file for x86_64:
LIBS = -lopencv_core \

...

../src/pvapi/staticlib/x64/4.4/libPvAPI.a
And for x86
../src/pvapi/staticlib/x86/4.4/libPvAPI.a
To build the GUI press ctrl+B. If it fails to build, install missing libraries using apt-get.
The Vision GUI
To run the vision GUI, you need to have root privileges. After building the vision tool in Qt, the executable should reside in the /Qtvision/bin folder. Start this executable using the provided launcher or using terminal (start using ctrl+alt+T):
sudo su

cd /home/eutaft/foosball/Qtvision/bin

./Qtvision
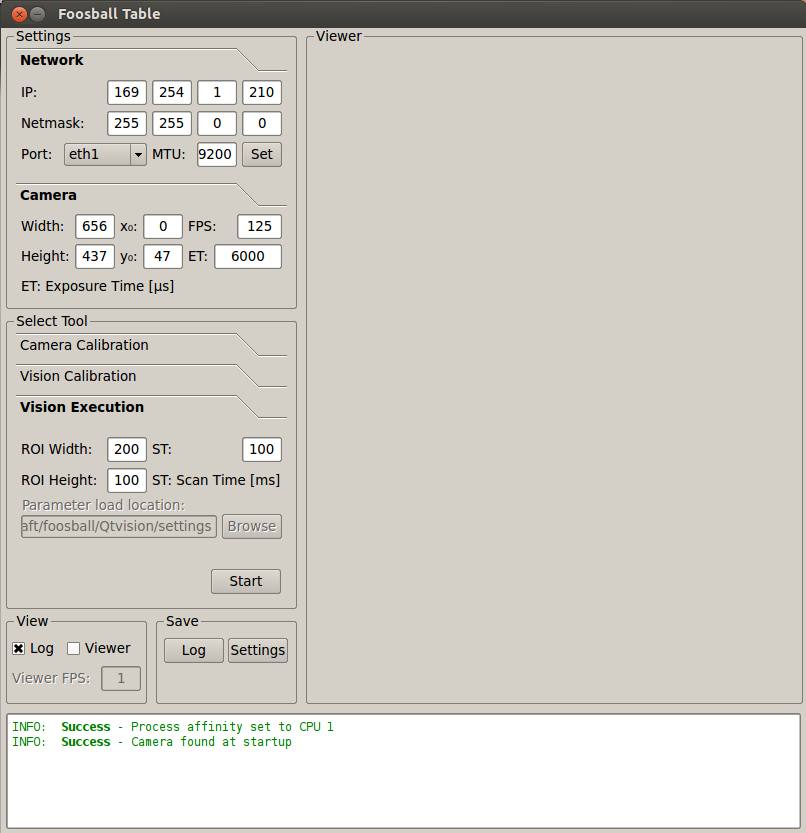
This will start the vision GUI, which currently looks like this:
Basic Settings
This GUI allows the user to set-up several basic settings that allow us to connect to the camera.
Setting up the LAN connection
In order to run the vision software, we must first establish a connection with the camera over ethernet. First we need the fix the adress of wired connection we are using the gnome network manager or ifconfig to the following settings:
Address:   169.254.1.210 (manual)

NetMask:   255.255.0.0

MTU    :   9200
Setting up basic settings
Network
These settings should be exactly the same as those entered when setting up the LAN connection.
Camera
- Width
- Number of pixels along width of the camera (longitudinal direction of the soccer field)
- Height
- Number of pixels along length of the camera (Lateral direction of the soccer field)
- [math]\displaystyle{ x_0 }[/math]
- Pixel value of the position [math]\displaystyle{ x_0 }[/math]
- [math]\displaystyle{ y_0 }[/math]
- Pixel value of the position [math]\displaystyle{ y_0 }[/math];
- FPS
- FPS stands for Frames Per Second, this is limited by the amount of data that can be sent over ethernet. Higher framerates can be achieved by changing the colormode [insert local link] and the size of the ROI [insert local link]. Setting it too high can cause failure to connect or a crash. More on this can be found in Mark Verrijts report.
- ET
- ET stands for exposure time, this is limited by the FPS.
- ROI
- ROI stands for region of interest, and its size is set in the vision-execution tab. This size is what will be processed by the vision software. Lowering the lateral (y) size will allow us to increase the FPS, because cropping in this direction can be done at the camera side (reducing the image size). Cropping in the other direction is done using software and will only decrease the computational load.
Camera Calibration
Camera calibration is crucial to achieve good performance.
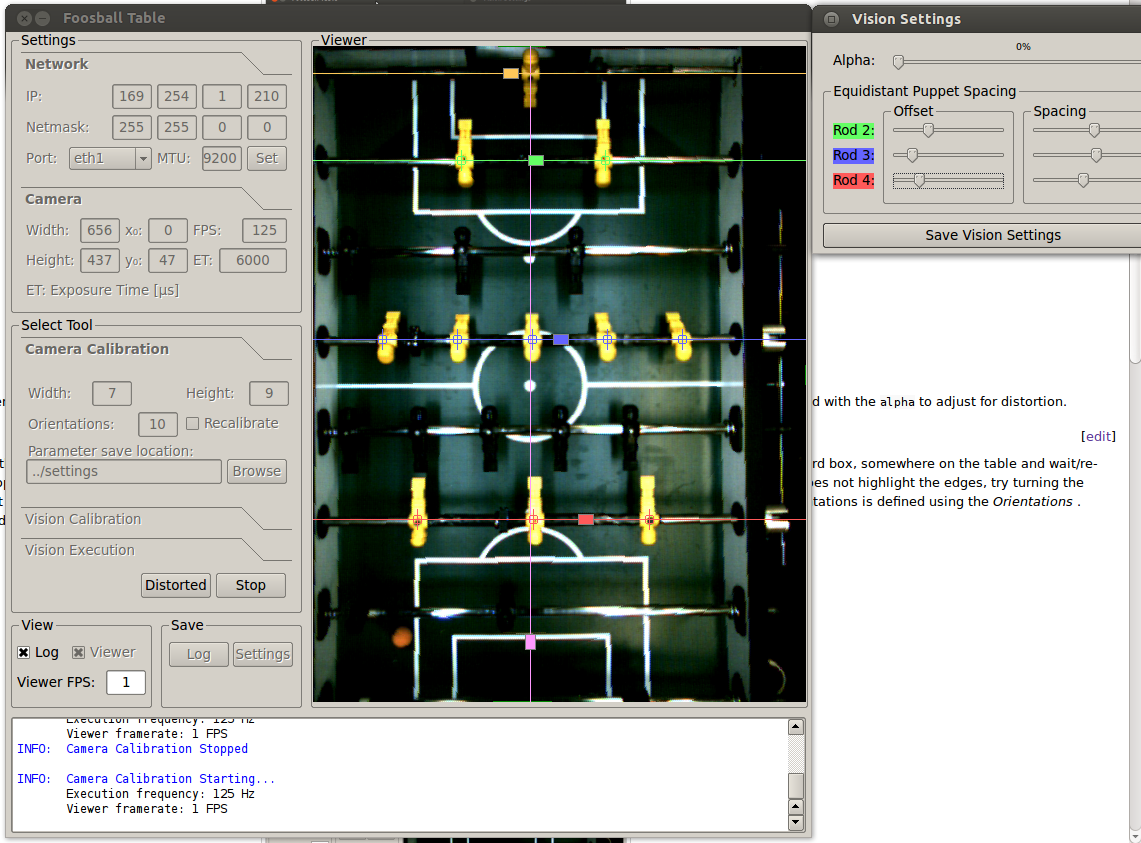
Make sure that the spacing between the puppets is correct, the center-line matches up and the longitudinal position of the rods is set correctly. You can to around with the alpha to adjust for distortion.
Recalibration
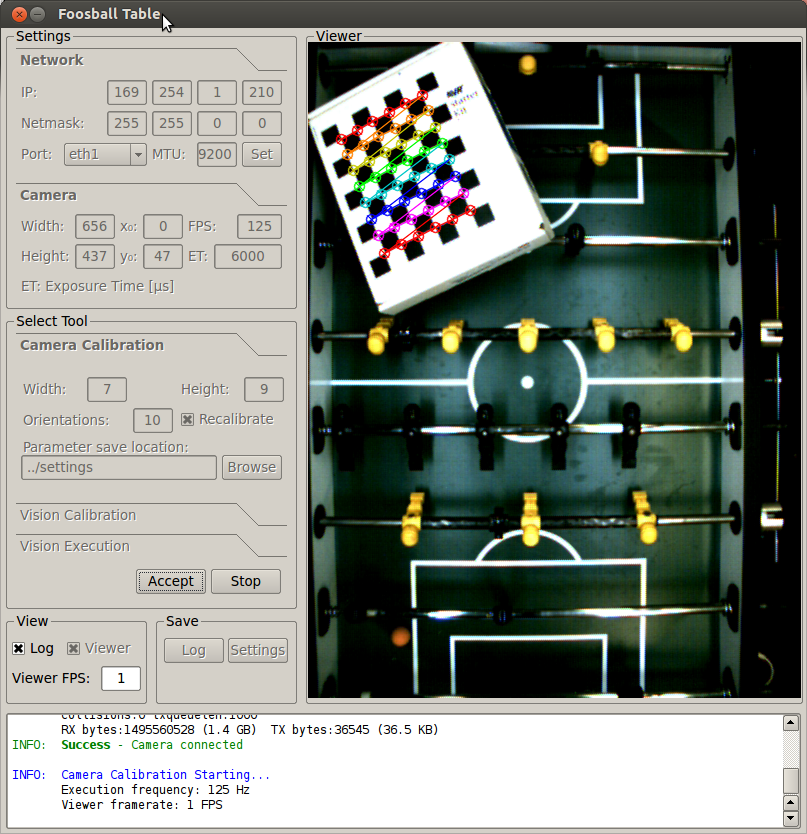
Recalibration involves calculating the matrix to undistort the image. To start re-calibration, check the recalibrate box and press start. Now place the checkerboard box, somewhere on the table and wait/re-orient until the checkerboard is properly detected. If it is properly detected (it should highligth the edges, see below) click accept and repeat the process. If it does not highlight the edges, try turning the light down (helps the best, cause it yields more `black' squares). It is good to place the checkerboard in a variety of orientations. The amount of (different) orientations is defined using the Orientations . Once you are done, the field should no longer look distored.
Color Calibration and Mask
Color and mask calibration is done in a seperate, Matlab-based, tool which you can start by selecting the vision calibration tab and pressing start (first click settings in the bottom of the gui to save the settings). Matlab will be started up and the calibration gui will show. If the camera is connected you can press 'From camera', and it show a (distorted) image of the field:
Color
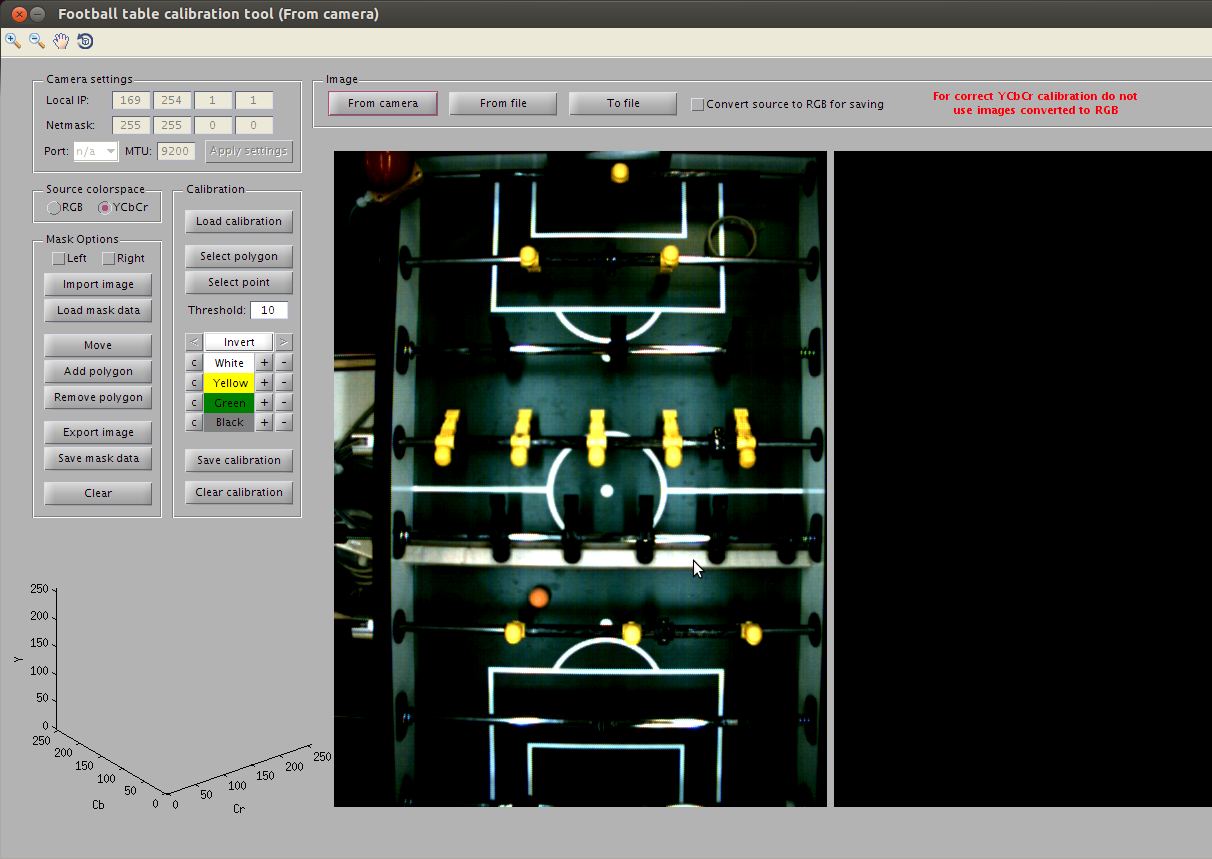
To load a calibration press 'Load calibration', currently the active calibration is defined in the top of the file Qtvision/src/visionexecute.cpp e.g. for orange you can load: #define F_COLSPACE "cal_7000ex_yuv422_orange.d24". If you desire to make a new calibration, there is no need to load one.
Color calibration is easiest when using 'From camera', and i recommend the following process:
- Place one or more balls spread out on the playing field
- Press from camera
- Now press select polygon and select an area of a particular color (e.g. green):
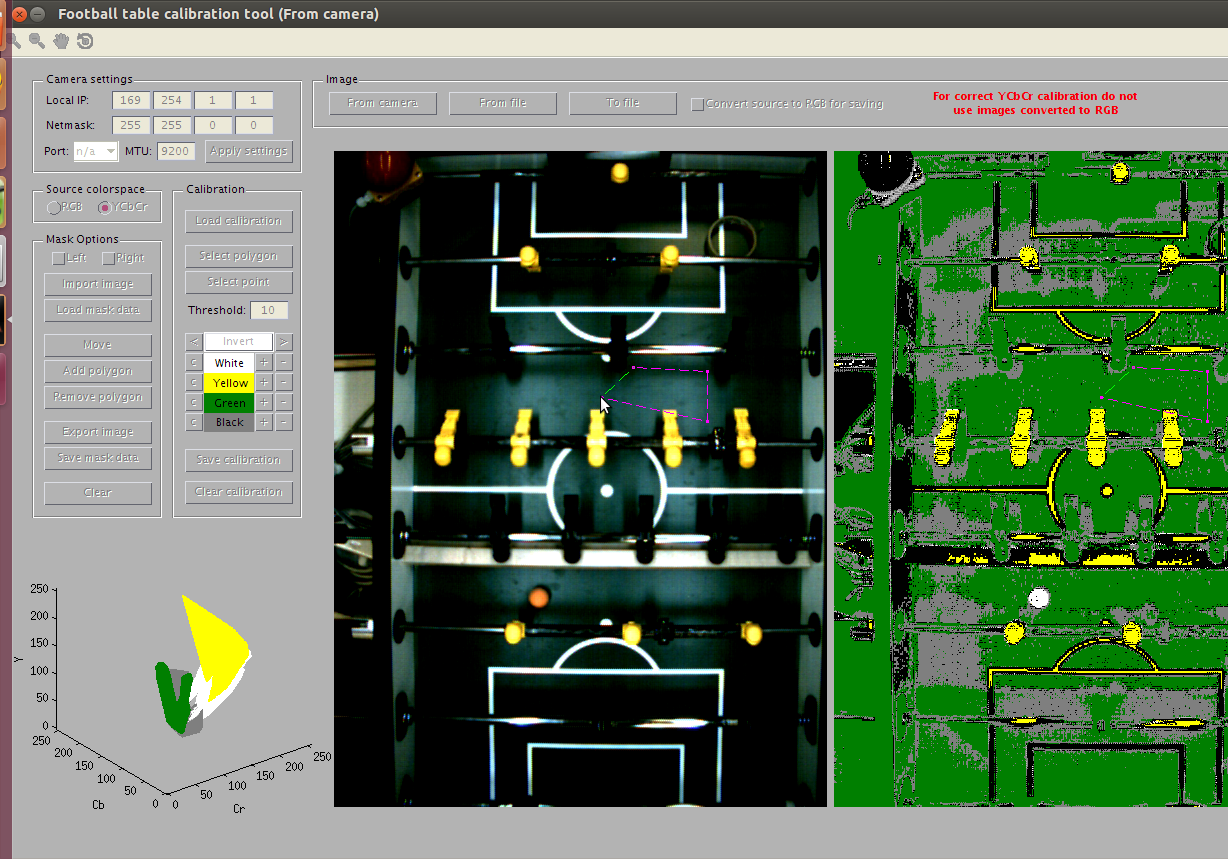
- When you are done selecting press the right mouse button
- Now press the
+near green, to add this area to the green color(sub)space. - Repeat this process for all other colors, 'white' referring to the color of the ball.
- Once all colors of this image have been defined press from camera again (move the balls around too)
- Repeat this process until you are satisfied. When you are, press 'Save calibration' and store it in the
Qtvision/binfolder (make the name matches with#define F_COLSPACE CALIBRATION_NAME.d24mentioned earlier
Mask
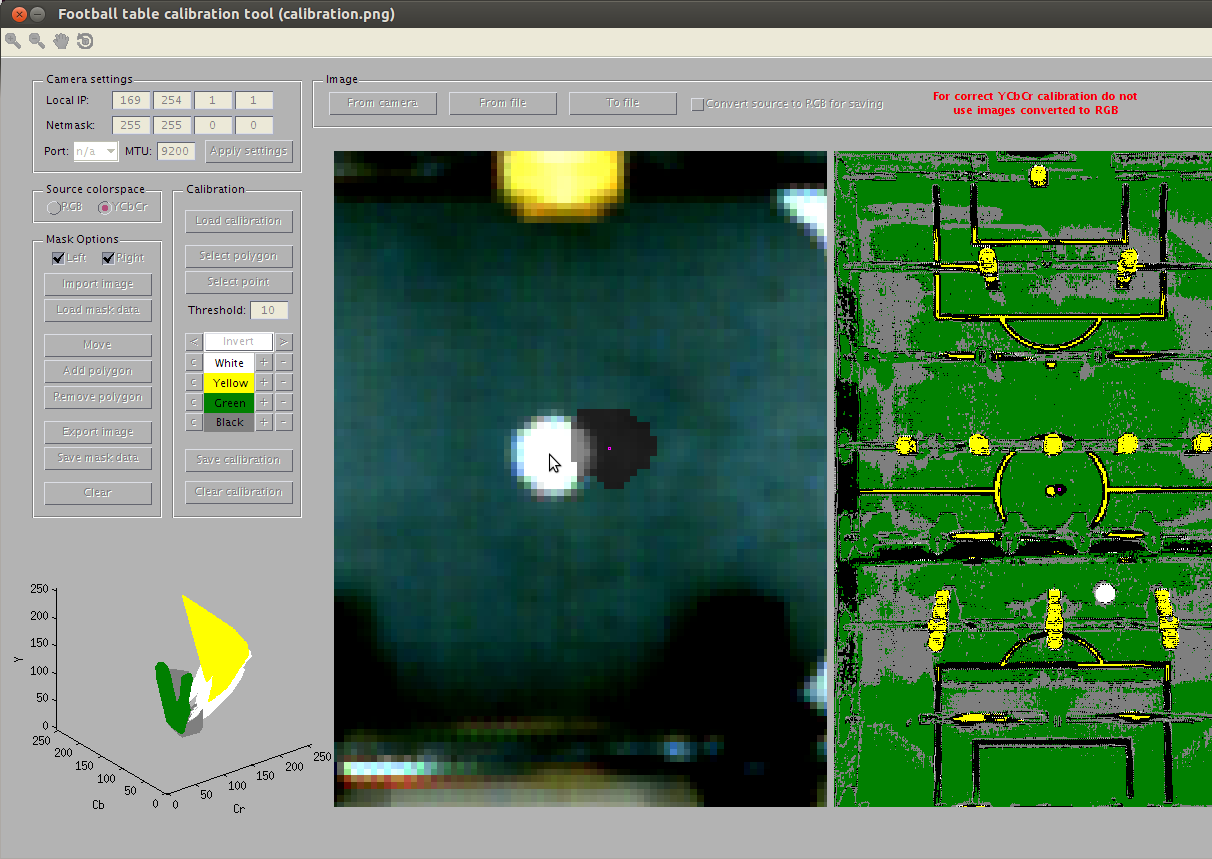
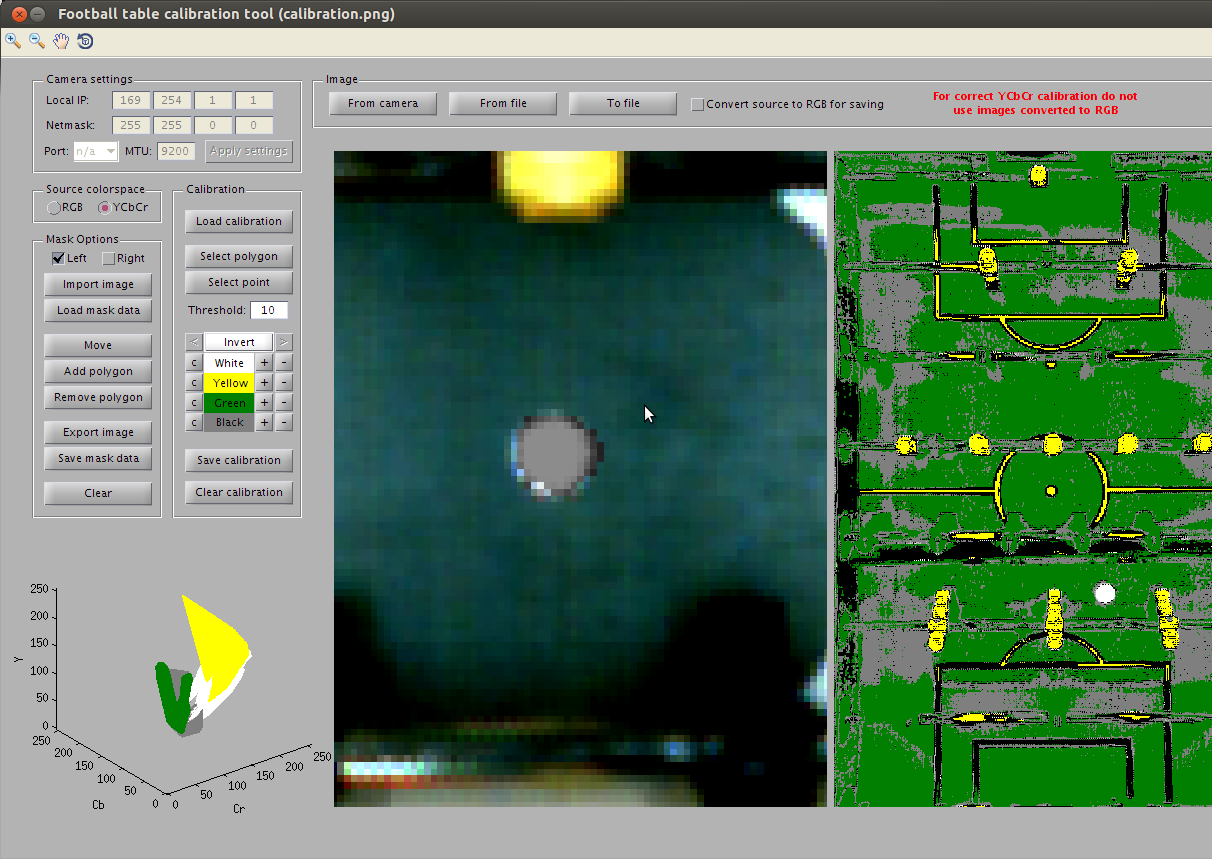
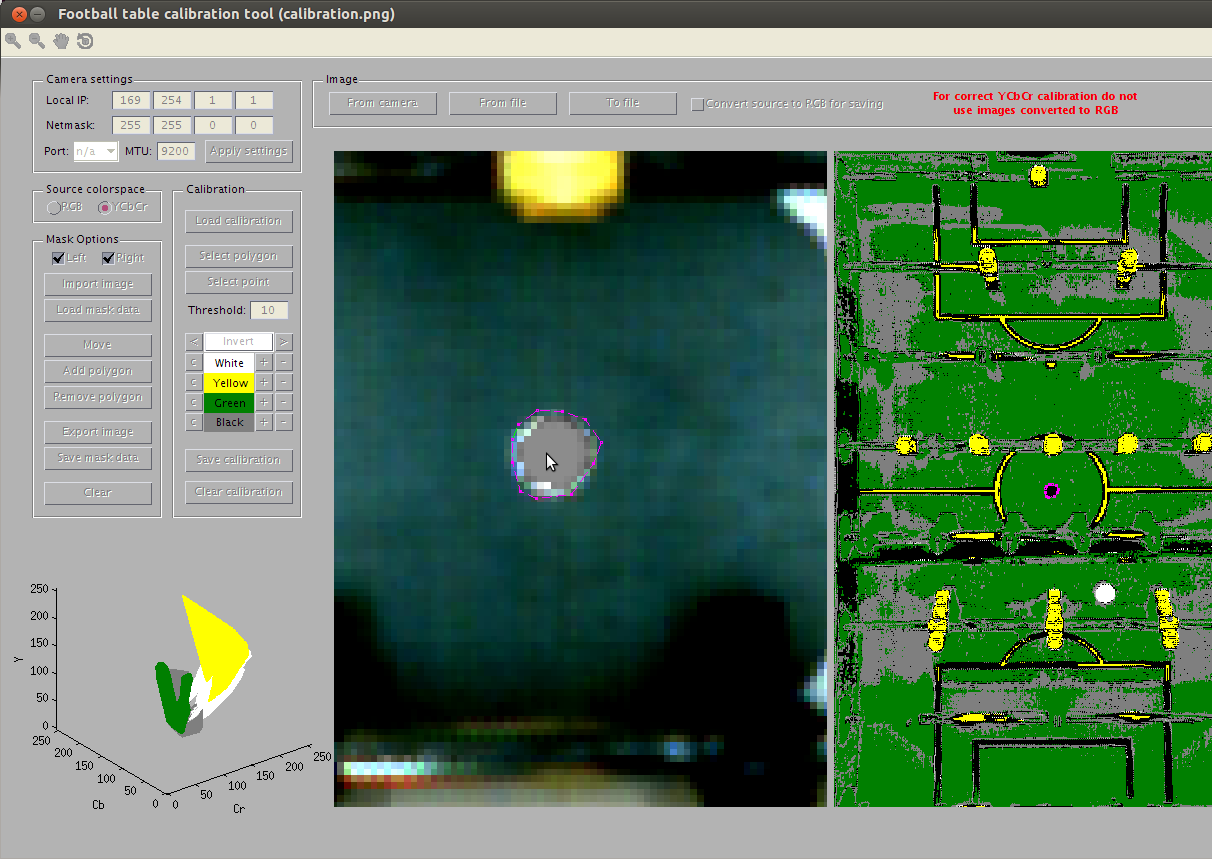
When using a white ball somethings will need to be masked. This can also be done in the same tool, however we now cannot use `From camera' because this currently yields an distorted image. Instead we use a figure which is created once camera calibration is started. So when starting editing the mask:
- First run the camera calibration, this creates a image called
calibration.pngin the folder the executable from which it was started. - Now start the calibration tool and click `from file' and locate the image that was just created. It will now show an un-distorted image in the left pane.
- Click `Import image', in Mask options and load the mask defined in the header of
visionexecute.cpp - If you wish to just adjust the re-position the mask, click move
- Now click on the left pane, move your mouse in the direction you want the mask to move and click again: the mask will move the distance in between the two clicks
- If you wish to add polygons to the mask, click `add polygon' and select the area you wish to mask followed by a click of the left mouse button:
- Repeat this until the mask is complete (Note:an orange ball does not require a mask)
- Now press `export image and overwrite the original.
- Now press `save mask data', and select a destination
Starting Vision
When everything is correctly calibrated, we can start vision by clicking the tab vision execution, and pressing start. Here we can also set the size of the region of interest, the part of the image that gets processed by the vision software. To view what we are detecting, check the viewer box and select any of the options.
The kalman/IMM filter settings
The kalman/IMM settings are currently done in the actual code and require recompilation. To turn on/off the IMM or KM filter, use the #define in visionexecute.h
The localization settings
The localization settings are currently done in the actual code and require recompilation. The normal detection of the ball center is done using a Hough-transform, alternatively it can be done using minmax, to changes this use the #define in visionexecute.h