Embedded Motion Control 2018: Difference between revisions
| Line 10: | Line 10: | ||
= Course Schedule and Lecture Slides = | = Course Schedule and Lecture Slides = | ||
Lectures will be given on Wednesdays from 15.45h-17.45h from in Luna 1.050. The lecture of <span style="color:#ff0000"> '''May 4''' </span> will be given from 10.45h-12.45h in | Lectures will be given on Wednesdays from 15.45h-17.45h from in Luna 1.050. The lecture of <span style="color:#ff0000"> '''May 4''' </span> will be given from 10.45h-12.45h in Auditorium 11. The preliminary course schedule is as follows: | ||
{| border="1" cellpadding="5" cellspacing="0" align="center" style="margin-left: 3em;" | {| border="1" cellpadding="5" cellspacing="0" align="center" style="margin-left: 3em;" | ||
Revision as of 09:26, 1 May 2018
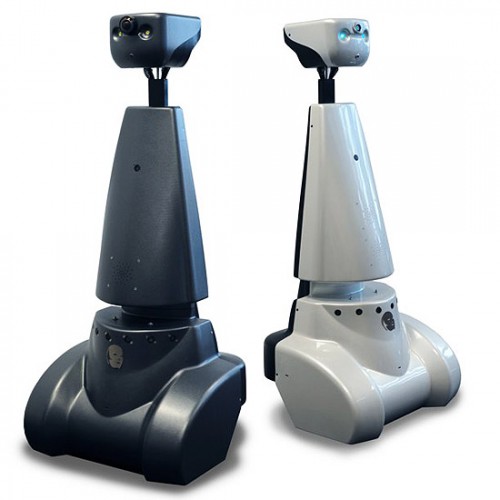
'PICO in the Hospital'

Introduction
This course is about software design and how to apply this in the context of autonomous robots. The accompanying assignment is about applying this knowledge to a real-life robotics task.
Course Schedule and Lecture Slides
Lectures will be given on Wednesdays from 15.45h-17.45h from in Luna 1.050. The lecture of May 4 will be given from 10.45h-12.45h in Auditorium 11. The preliminary course schedule is as follows:
| April 25 | No lecture (see Canvas!) | |
| May 2 | Introduction by René van de Molengraft | Tooling and Infrastructure by Wouter Kuijpers |
| May 4 | Best Practices in System Design for Robot Control by Herman Bruyninckx | Architecture by Herman Bruyninckx |
| May 9 | No lecture | |
| May 16 | First presentation of the design by the groups. 6-minute presentation, about the group's initial design. Afterwards 4 minutes for questions. | |
| May 23 | Escape Room Competition | Worldmodeling by Herman Bruyninckx |
| May 30 |
| |
| June 6 | Presentation of final design by the groups. | |
| June 13 | Final Competition | |
| June 14 | Deadline Wiki Pages | |
Assignment
Check this page regularly to find out the new assignment for Embedded Motion Control in 2018!
Escape Room Competition

Challenge Specifications
- You have finished the assignment if PICO did not bump into walls and the entire rear wheel is across the finish line.
- Do not touch the walls! Slightly touching is allowed, however, bumping (i.e., driving head-on into a wall) is not allowed! If PICO hits the wall, we decide whether it counts as bumping.
- Every team has two trials (= max one restart). A trial ends if:
- PICO bumps into the wall
- PICO has not moved or has not made sensible movements (as judged by the tutors) for 30 seconds
- The total time limit of 5 minutes per group is reached
- The group requests a restart (on the first trial)
- restart means:
- PICO restarts at the defined start position
- The trail time (= the time graded) is reset, but
- the total time keeps running
- Maximum speed (is limited in PICO): 0.5 m/s translational, 1.2 rad/s rotational.
- There will be no second attempt if first attempt was successful
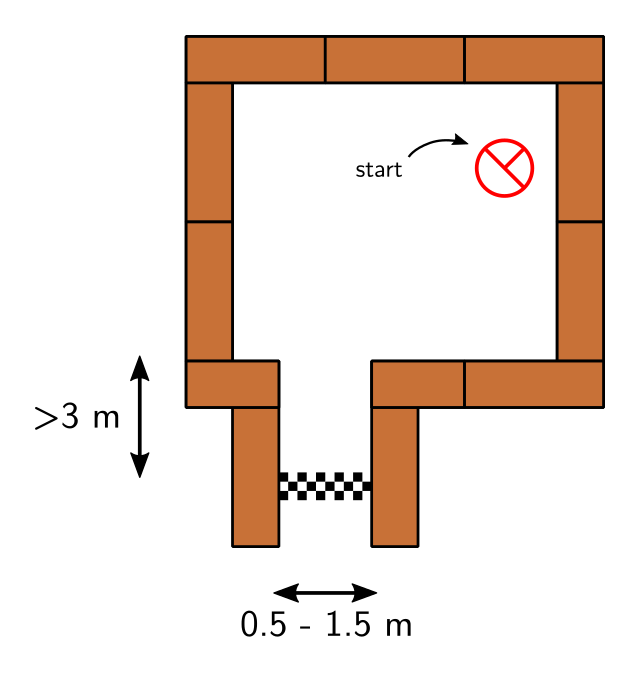
On the right you can find one example of a Escape Room Challenge.
Environment Specifications
- The shape of the room is rectangular, the dimensions will not be given before the start of the challenge.
- PICO starts at a random position in the room (but equal for all groups), PICO does not necessarily face the exit, nor a straight wall.
- The orientation of the corridor will be perpendiculair to the wall.
- The wall (on the far end) of the corridor will be open
- The walls might not be perfectly straight, the corners might not be perfectly perpendicular, the walls of the corridor might not be perfectly parallel. The width of the corridor will be reasonable (somewhere between 0.5 and 1.5 meters).
- At the exit, the finish line is located more than 3 m into the corridor. The walls that can be used to align PICO will be a little bit longer.
Robot Software
- Make sure your software is easy to set-up, i.e:
- Your software can be updated with one easy command, e.g. 'git pull'
- Your software can be compiled using 'cmake' and 'make'
- To start your software, only one executable has to be called
- If your set-up deviates from this method, let your tutor know 1 week before the challenge!
- The software of all groups will be updated on the robot before the challenge starts
- This way, teams starting the challenge have as much time as teams that do the challenge at the end
Hospital Competition

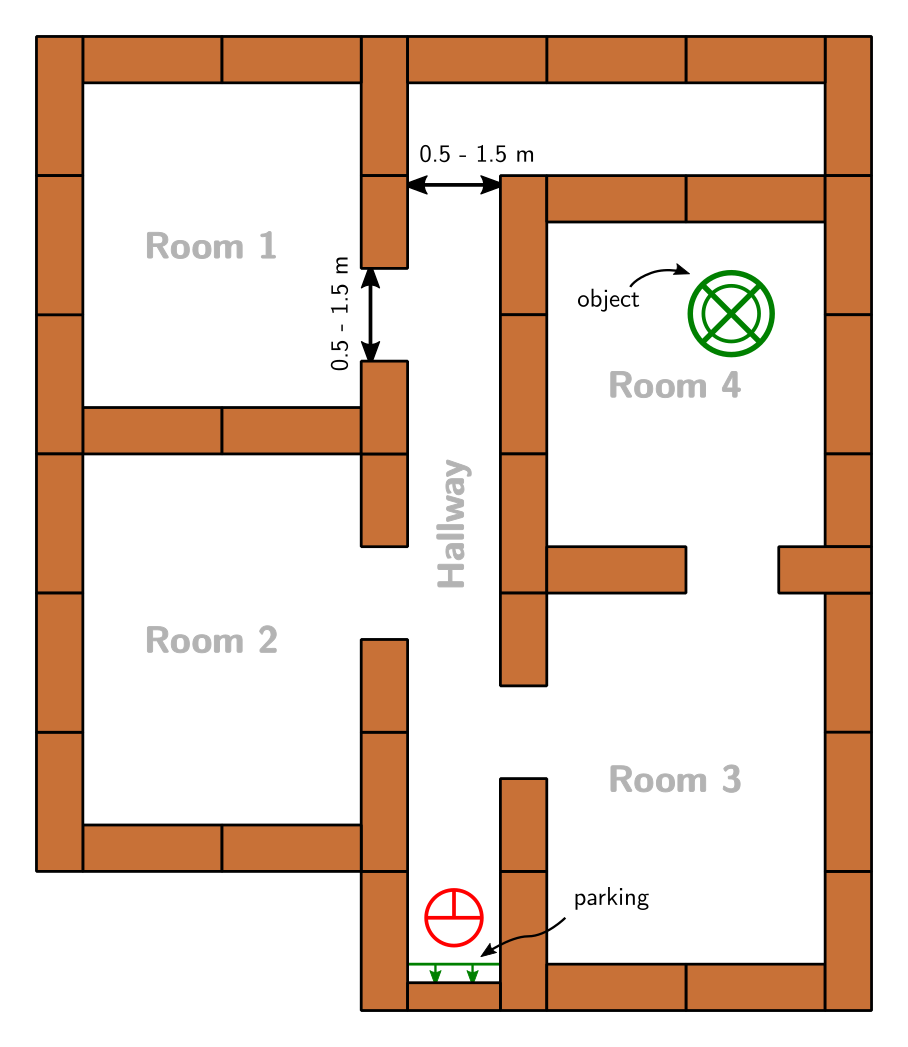
Challenge Description On the right you can find one example of a possible Hospital setup.
- PICO will start in the Hallway, PICO will start up to 1 m away from the parking wall and definitely not touching it. PICO might not be aligned perfectly with the walls, but the wall on which the parking has to be done is behind PICO at first.
- After starting the software, PICO has to explore the (3-6) rectangular rooms of the Hospital, building a map, which will be needed for a later task. The doors inside the hospital will be (time-invariant) openings in the wall of about 0.5-1.5 m. It is possible that a room has more than one door (see Room 3 in the example), however it is not possible to drive in a loop.
- During the mapping, one of the team members has to show the map being built and comment on the map and the operation of PICO. How the mapping is presented is left up to the groups, remember we would like to see the worldmodel and understand what PICO is doing. (you could use the io.speak functionality here!)
- When the map building is complete, PICO has to park backwards to the wall behind the starting position. Parking is done upon touching the wall, assessed by the tutors. After PICO parked, PICO should say: "I am parked!" (io.Speak).
- Upon touching the wall, a second executable could be started, note however that it has to be build before the challenge starts!
- We will then place an object in one of the rooms, PICO has to find this object and stand still close to it and say: "I found the object!".
- When PICO stopped moving close to the object, the challenge is completed.
Challenge Specifications
- Do not touch the walls! Slightly touching is allowed, however, bumping (i.e., driving head-on into a wall) is not allowed! If PICO hits the wall, we decide whether it counts as bumping.
- Every team has two trials (= max one restart). A trial ends if:
- PICO bumps into the wall
- PICO has not moved or has not made sensible movements (as judged by the tutors) for 30 seconds
- The total time limit of 10 minutes per group is reached
- The group requests a restart (on the first trial)
- restart means:
- PICO restarts at the defined start position
- The trail time (= the time graded) is reset, but
- the total time keeps running
- Maximum speed (is limited in PICO): 0.5 m/s translational, 1.2 rad/s rotational.
- There will be no second attempt if first attempt was successful
Visualization
- Your code should save a snapshot of the model (e.g., using OpenCV)
- The final snapshot should be saved after parking and can be used for presentation while pico finds the object
Robot Software
- Make sure your software is easy to set-up, i.e:
- Your software can be updated with one easy command, e.g. 'git pull'
- Your software can be compiled using 'cmake' and 'make'
- It is allowed to use multiple executables. Note that the Mapping/Parking-phase and Searching-phase can have separate executables, both have to be build before the challenge.
- If your set-up deviates from this method, let your tutor know 1 week before the challenge!
- The software of all groups will be updated on the robot before the challenge starts
- This way, teams starting the challenge have as much time as teams that do the challenge at the end, compiling in between trials is not allowed.
- If you use a separate catkin workspace
- Make sure this workspace is compiled during the final testing hour
- Building separate catkin workspaces during the final challenge is not allowed
- The safest way to make sure your code works is by avoiding catking workspaces and including everything in your CMakeLists.txt
Hint
- The following hint is provided regarding the location of the object:
- The object will be located in the room for which most openings (i.e., doors) have to be passed through to enter it
Getting Started
To get started, please do the tutorials on the Tutorial Page.
FAQ
Here you can find a collection of Frequently Asked Questions. Please check this page before contacting the student assistants or the tutors! If you find any issues or questions you had to deal with, please add them as well so your colleagues don't run into the same problems.
Group Wiki Pages
Group 1 - visit wiki - Tutor:
Group 2 - visit wiki - Tutor:
Group 3 - visit wiki - Tutor:
Group 4 - visit wiki - Tutor:
Group 5 - visit wiki - Tutor:
Group 6 - visit wiki - Tutor:
Group 9 - visit wiki - Tutor:
Group 10 - visit wiki - Tutor:
Pico test schedule
Be sure you have your software on git before coming to the test session so that you only have to git clone/git pull to get your code on the robot!
Please charge the robot whenever possible so there is no down time due to empty batteries.
Submissions are last checked the day before at 22:00.
First slots will be announced soon
Contact Details
Tutors
Bob Hendrikx - r dot w dot m dot hendrikx at tue dot nl
Hao Liang Chen - h dot l dot chen at tue dot nl
Jordy Senden - j dot p dot f dot senden at tue dot nl
Peter Dooren - p dot v dot dooren at tue dot nl
Manuel Muñoz Sánchez - m dot munoz dot sanchez at tue dot nl
César López - C dot A dot Lopez dot Martinez at tue dot nl