Firefly Eindhoven - Three-Drone Visualization and Simulation
* Detail the Simulink simulation environment
Introduction
The Drone Simulation/Visualization was initially made to obtain a visual simulation of the drone trajectories. The purpose was to simulate the behavior of the drone when changes in the high-level controller were made. In addition, this also served the purpose of acting as a proof of concept for the show when the drones were not available.
But these visualizations became very significant at the TMC Event, when the team plotted the movement of the actual drone in simulation environment and the other two virtual drones behaved as slaves and followed their trajectory according to the movement of the master drone or the real drone. The visualization aimed to replicate the environment of the show itself.
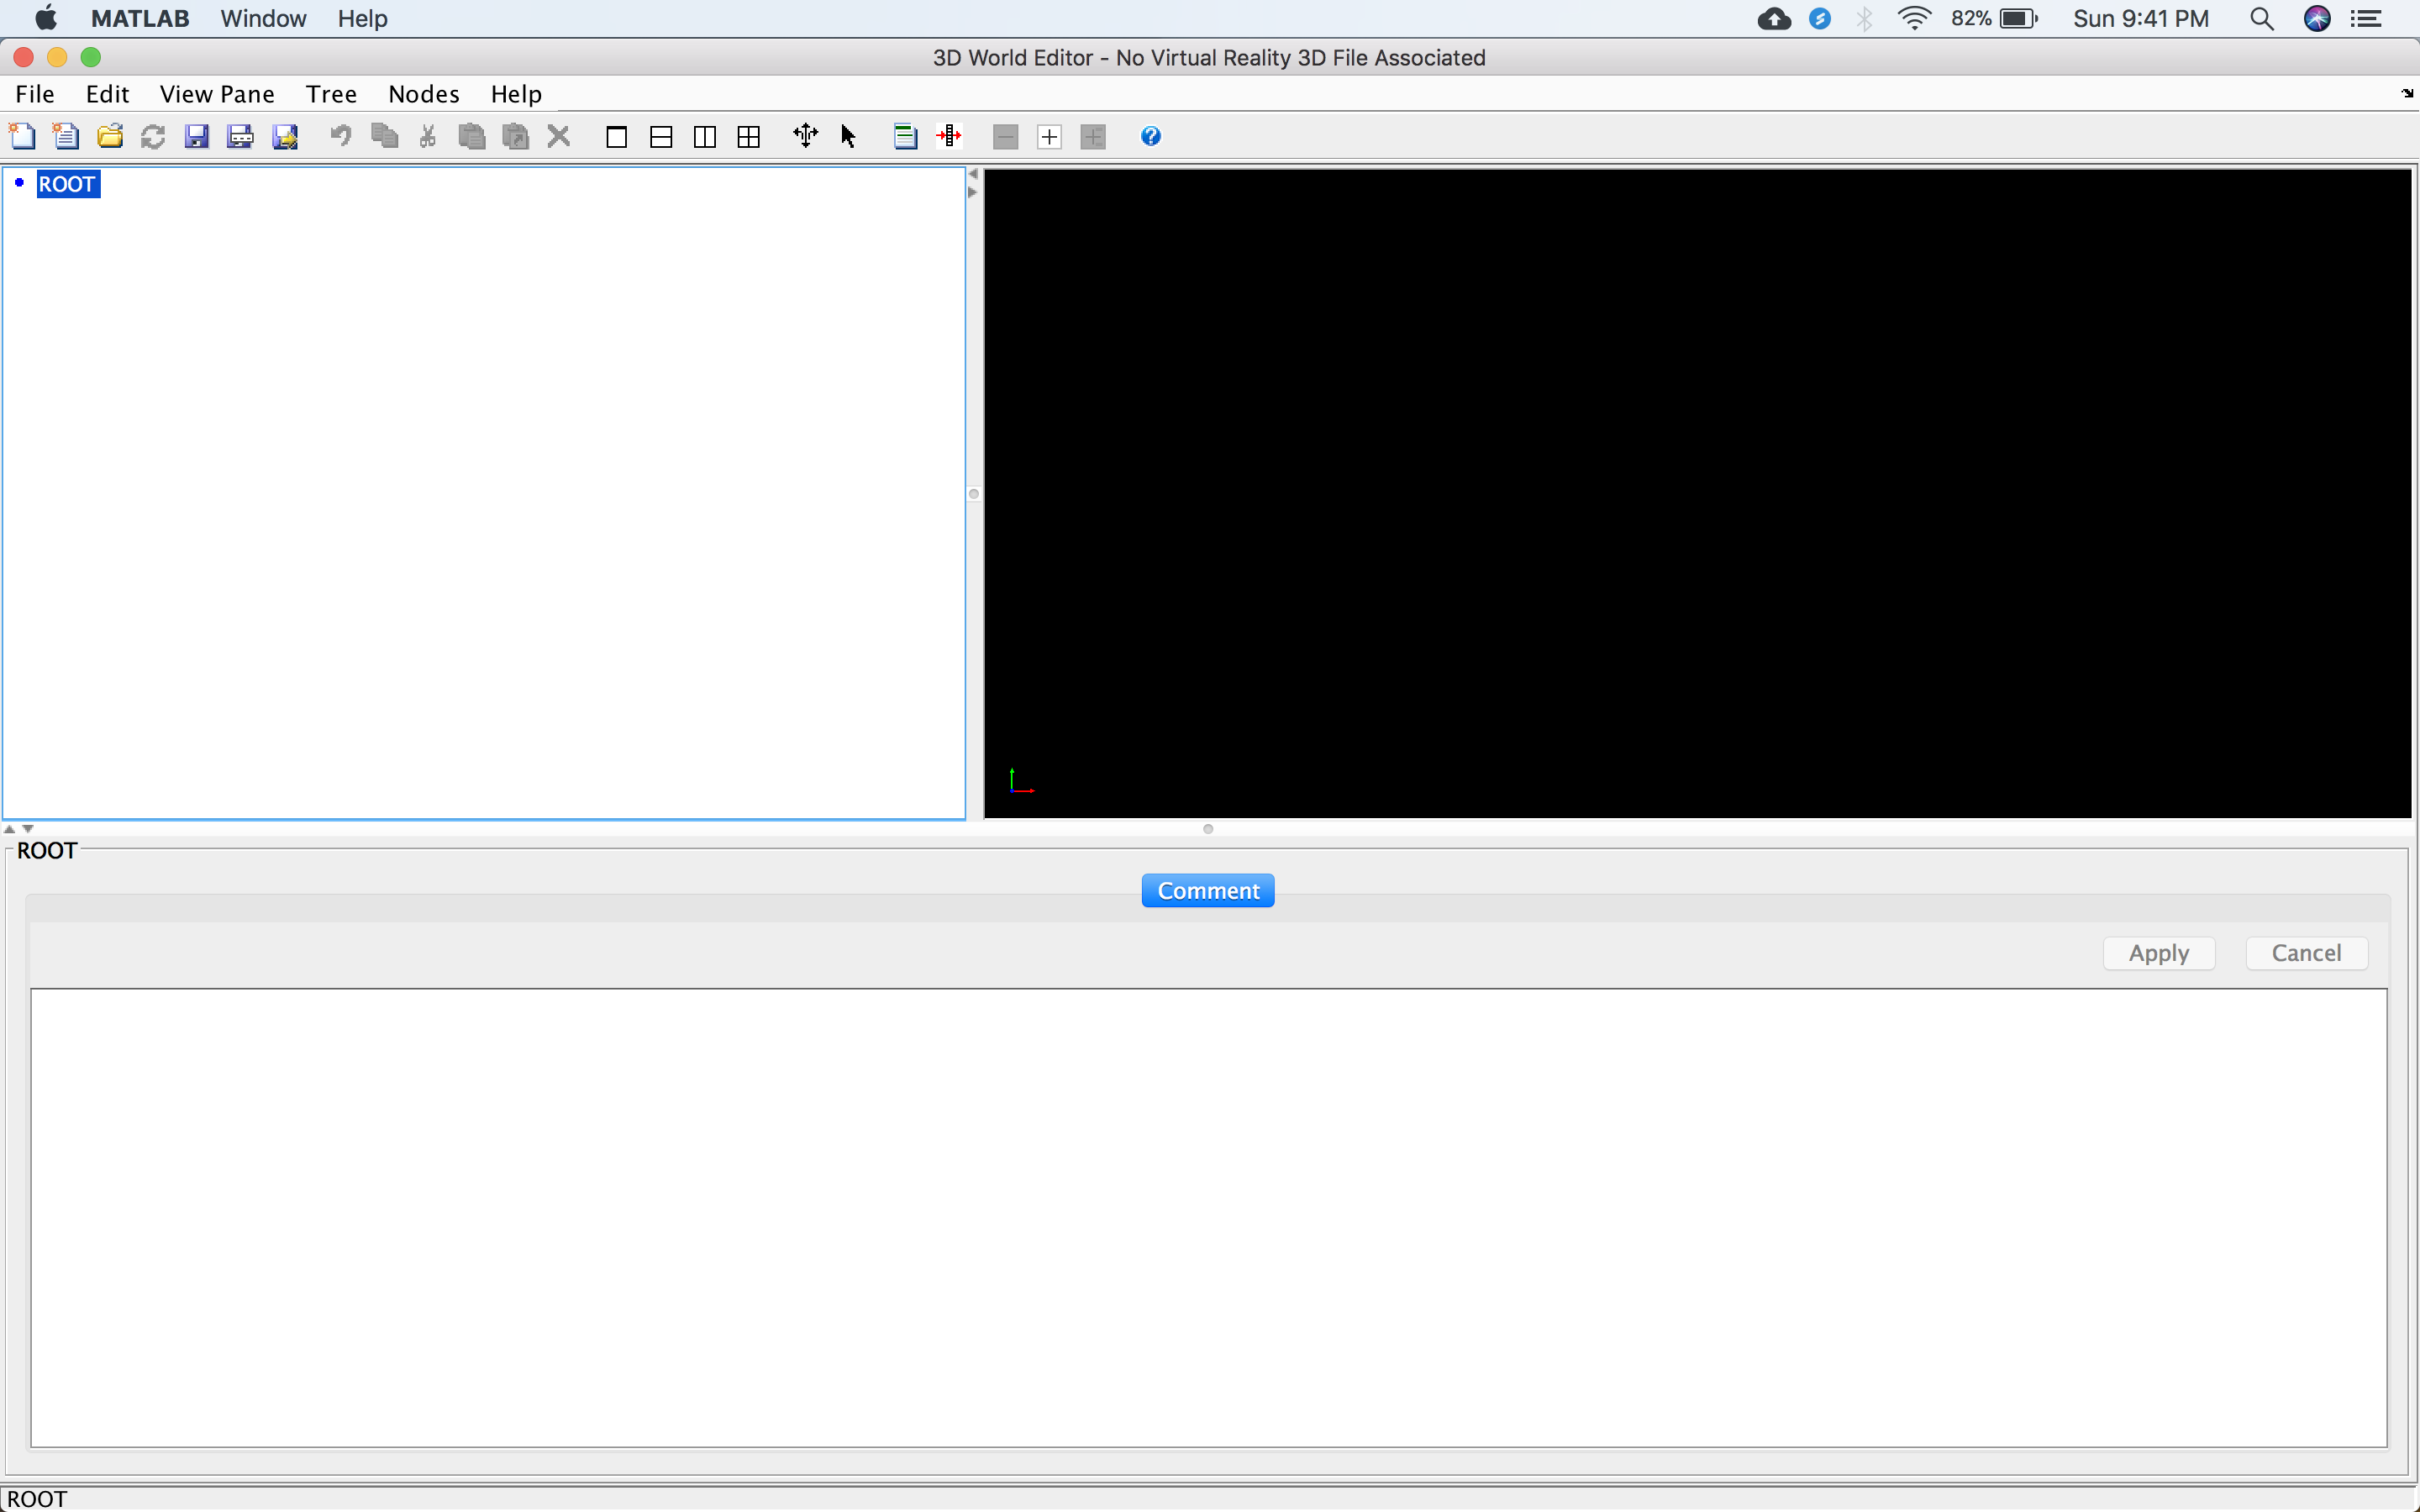
The 3D World Editor
The three-dimensional of visualization of the complete show was made using the 3D World Editor tool of Matlab/Simulink. 3D world editor is a VRML (Virtual Reality Modeling Language) editor. The simulink block that is used for making 3D animations is called VRSink. This can be located in the Simulink 3D Animation in the library browser in Simulink.
Clicking on the VR Sink block opens a dialogue box. And then using the 'New' button opens the 3D World Editor where the complete 3D Animation can be created. Once the simulation environment has been created, the environment can be saved as a .wrl file. This can be then be added as a source file for the VR Sink block. The animation created using this editor will be static and the movement objects is done via connecting the other simulink blocks to the VR Sink block.
Making the Simulation Environment
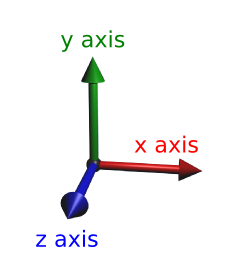
Colour Codes for Axis:
1. Red Arrow: x-axis
2. Green Arrow: y-axis.
3. Blue Arrow: z-axis
Under the Root node, any object can be added as a Transform. For instance adding a block or box can done under this hierarchical order:
 Transform
   children
      Shape
         appearance
            Appearance
               material
                  Material
               texture
               textureTransform
            Geometry
               Box
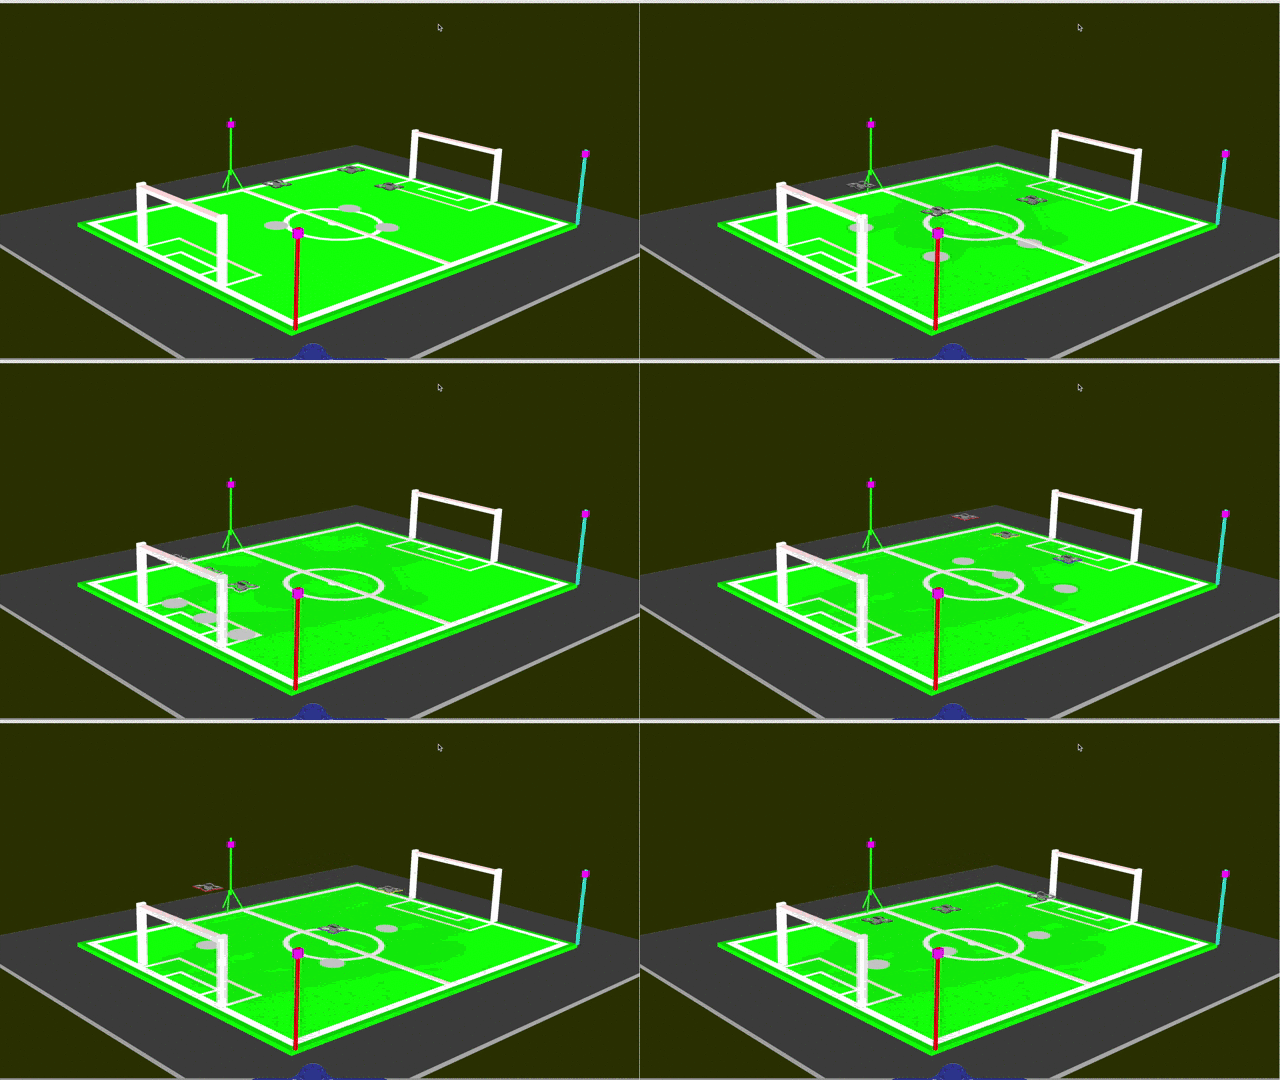
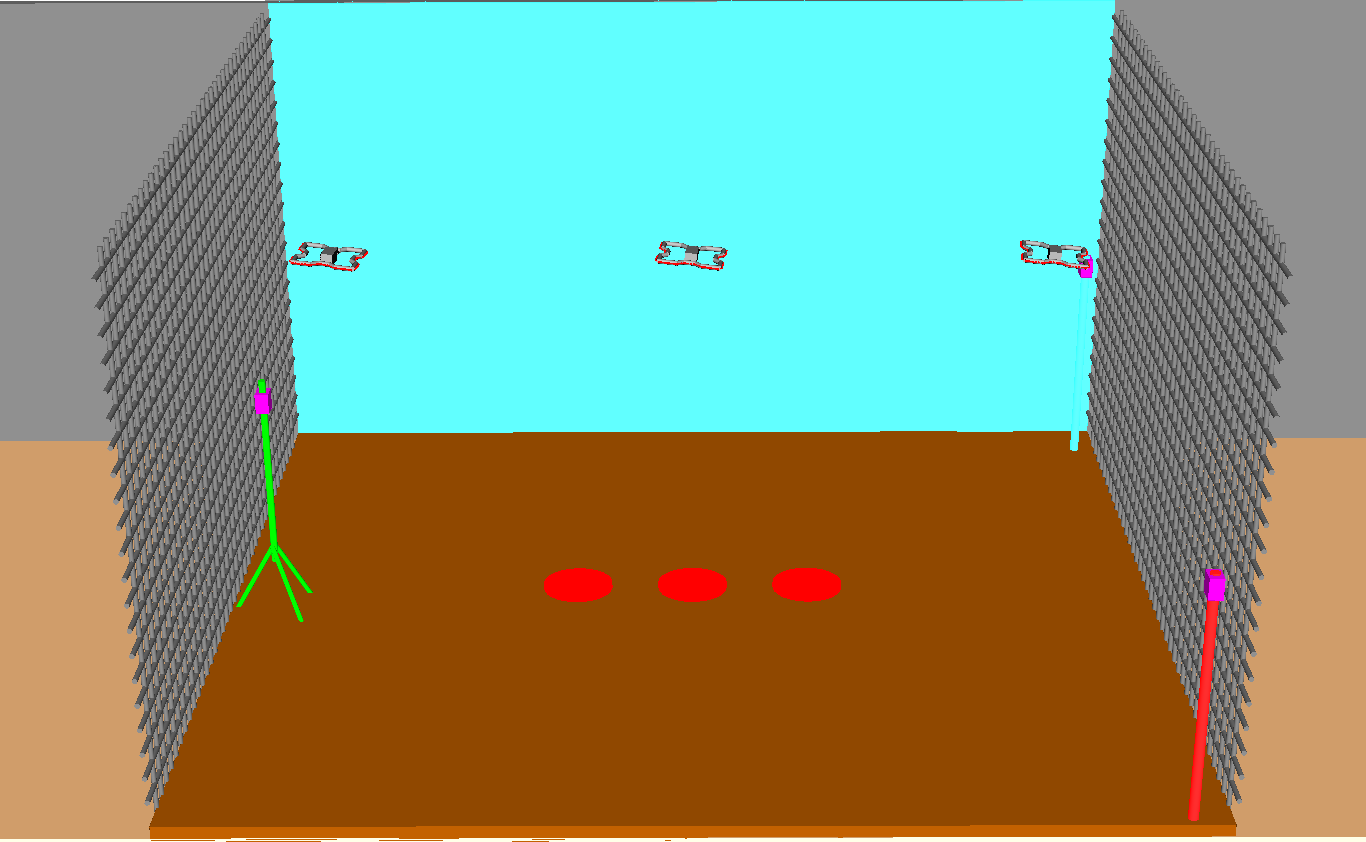
The group prepared two simulation environments. One which represents the Robot Soccer Field and the other looked like TMC Location for the Drone Show at the TMC Event.
Robot Soccer Field Visualization
TMC Event Visualization
TMC Location Visualization
The visualization used to the TMC Event represents the environment of the location. The simulation consists of the following transforms:
1. UWB1
2. UWB2
3. UWB3
4. Ground
5. BackWall
6. RightNet
7. LeftNet
8. Quad1
9. Quad2
10. Quad3
11. Shadow1
12. Shadow2
13. Shadow3
14. CornerA (Viewpoint)
15. CornerB (Viewpoint)
16. CornerC (Viewpoint)
17. South (Viewpoint)
18. SouthLarge (View point)
19. West (Viewpoint)
20. WestLarge (Viewpoint)
21. East (Viewpoint)
22. EastLarge (Viewpoint)
23. North (Viewpoint)
24. NorthLarge (Viewpoint)
25. Top (Viewpoint)
The Ground and the Backwall Tranforms are just collection of two blocks with very small thickness but very large width and height. Compared to the Ground, the Backwall is just rotated along the y-axis by 90 degrees.
Setting up manually by altering the values of Pos and Dir vectors one by one is very tedious and difficult. Therefore one the objects are set, it is possible to open the VR Sink block as a visualization where by using the mouse it is possible to adjust the viewpoint. Once the correct viewpoint is selected it is possible to save the current view as a viewpoint by clicking on 'Create Viewpoint' in the Viewpoint menu in the top pane of the window.
VR Sink Simulation Window
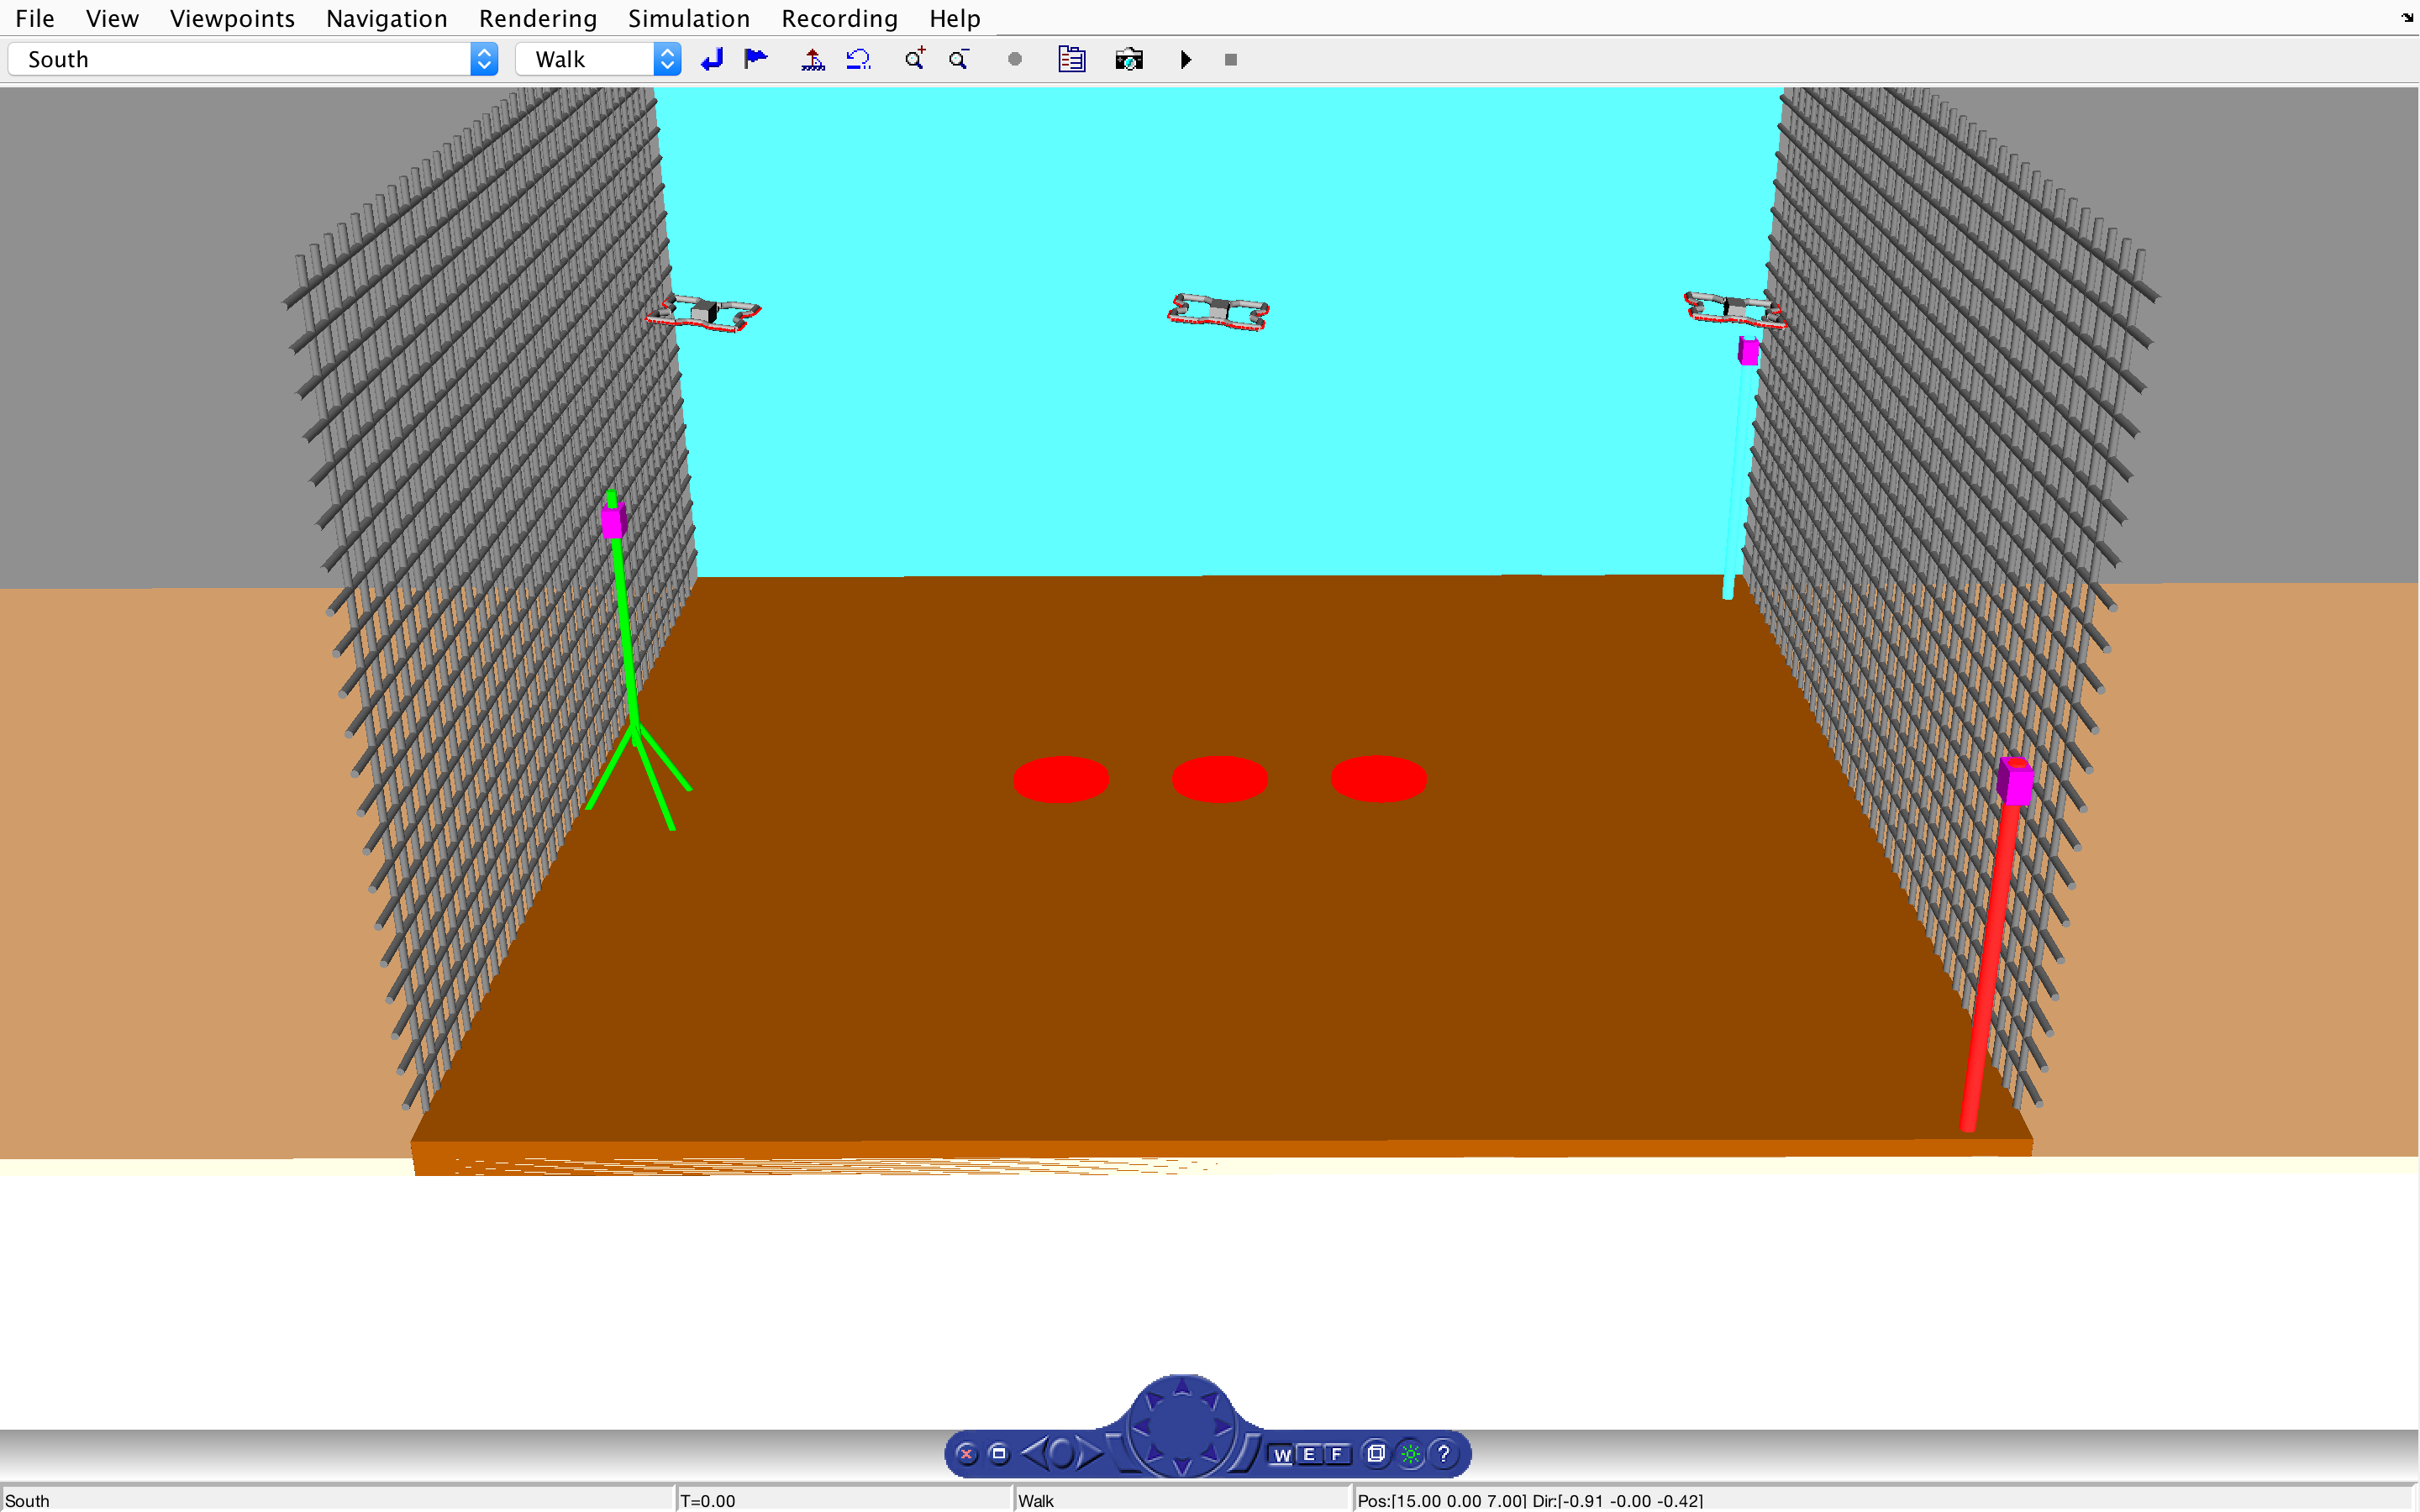
The Drone used in the simulation were created using cylinders and blocks. Each drone has four arms and a hull. Each arm consists of five cylinders. And the Hull is just a box. In addition, each drone also consists of 88 LEDs, 22 per arm. These LEDs are also blocks added manually.
The shadow of each drone is a thin cylinder that has the same translation input as the Drone, but with the values of 'z' fixed to 0.4.
The Nets are also cylinders with very small radius and large heights placed closed to each other. And the Ultra-Wide Band units and beacons are also made using cylinders and blocks.
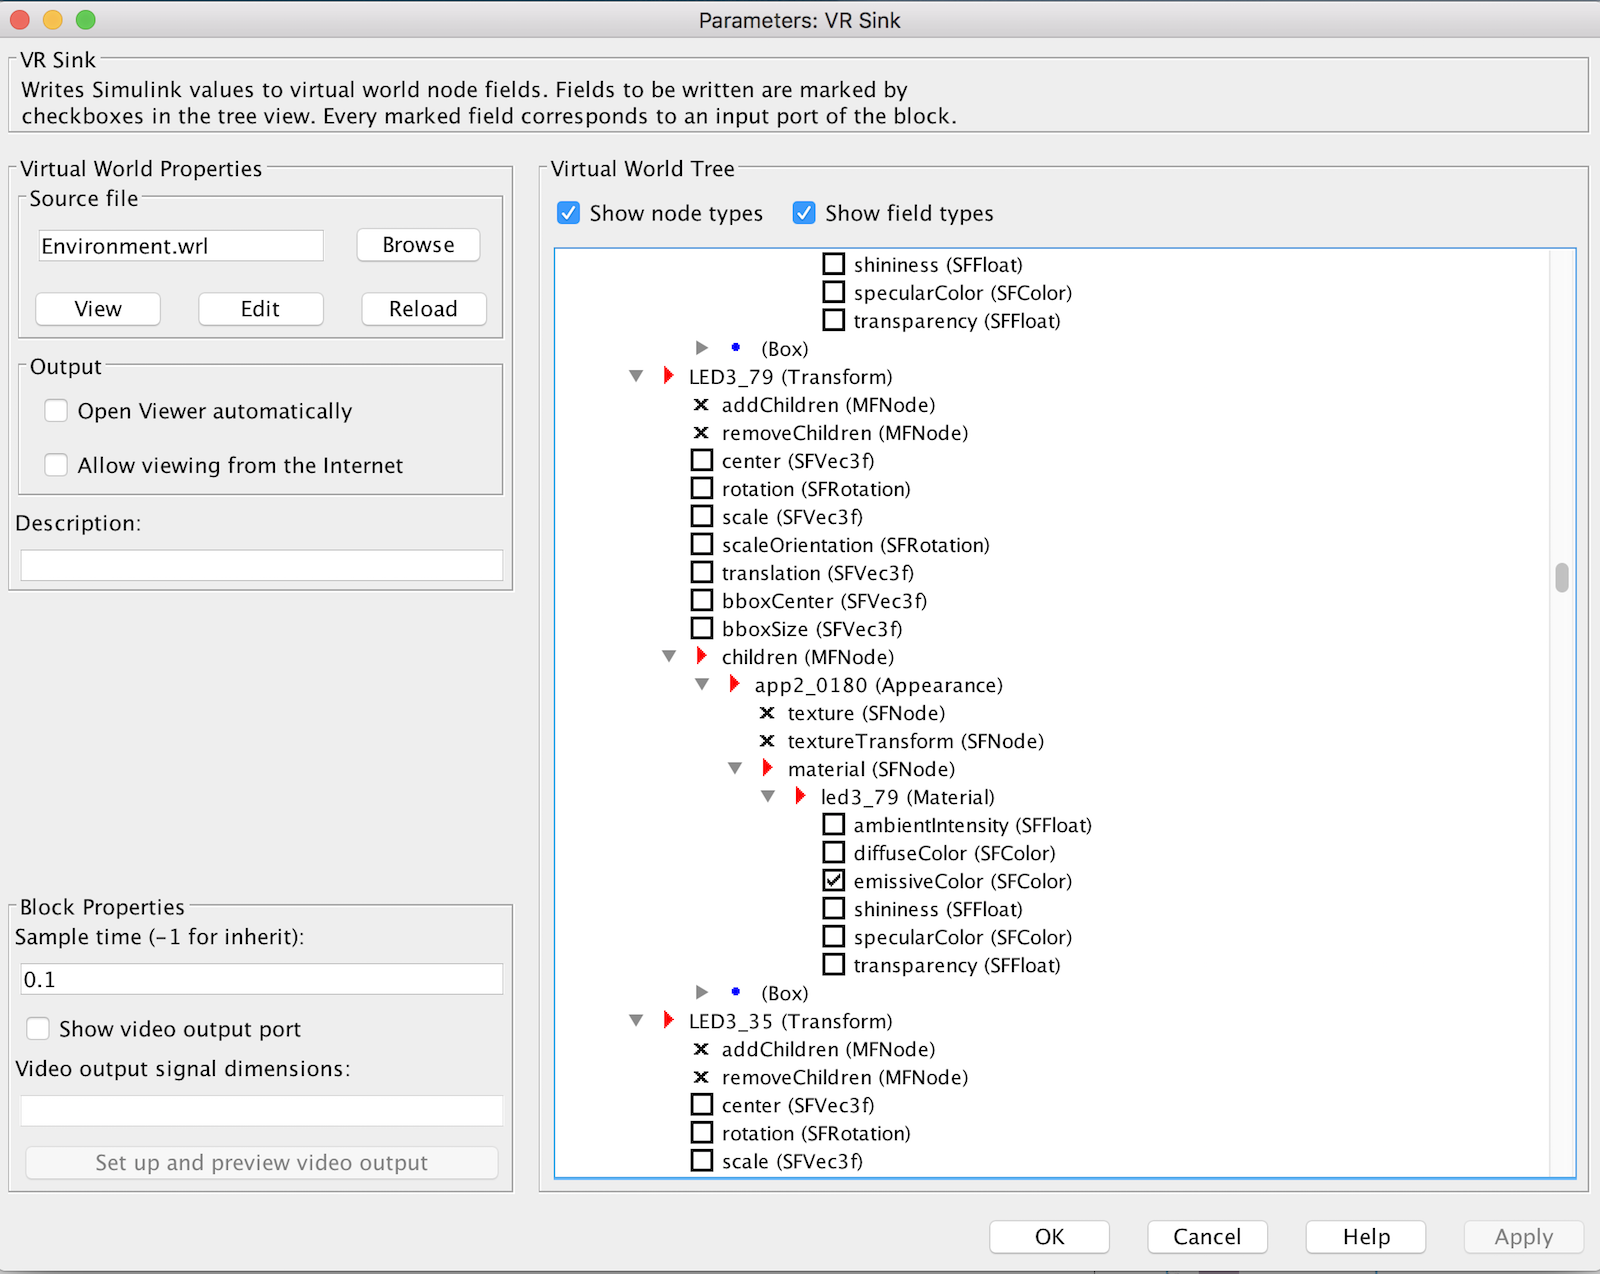
In order to receive signals from the blocks external to the VR Sink block, open the VR Sink block and in the simulation menu in the top pane click on block parameters.
This will open the Parameters of the VR Sink block. In the virtual world tree, the check boxes behind the transform parameters represent whether the the VR Sink will have an input port corresponding to that signal or not. Checking the checkbox creates an input port in the VR Sink block via which it is possible to have variable values of those parameters.
For instance, the LED patterns for the simulation can be obtained by feeding the RGB Values of the LEDs using the LED Pattern files, where these RGB values change over simulation time. This is also how the translation and orientation for the drones and the shadows is achieved in the simulation.
In order to make the simulation as real as possible, the size ratios of the drones to the show area and the movements of the drone are set to be the same as in actuality.
Parameters Block
- Explain the blocks from a high-level overview and their respective interconnections
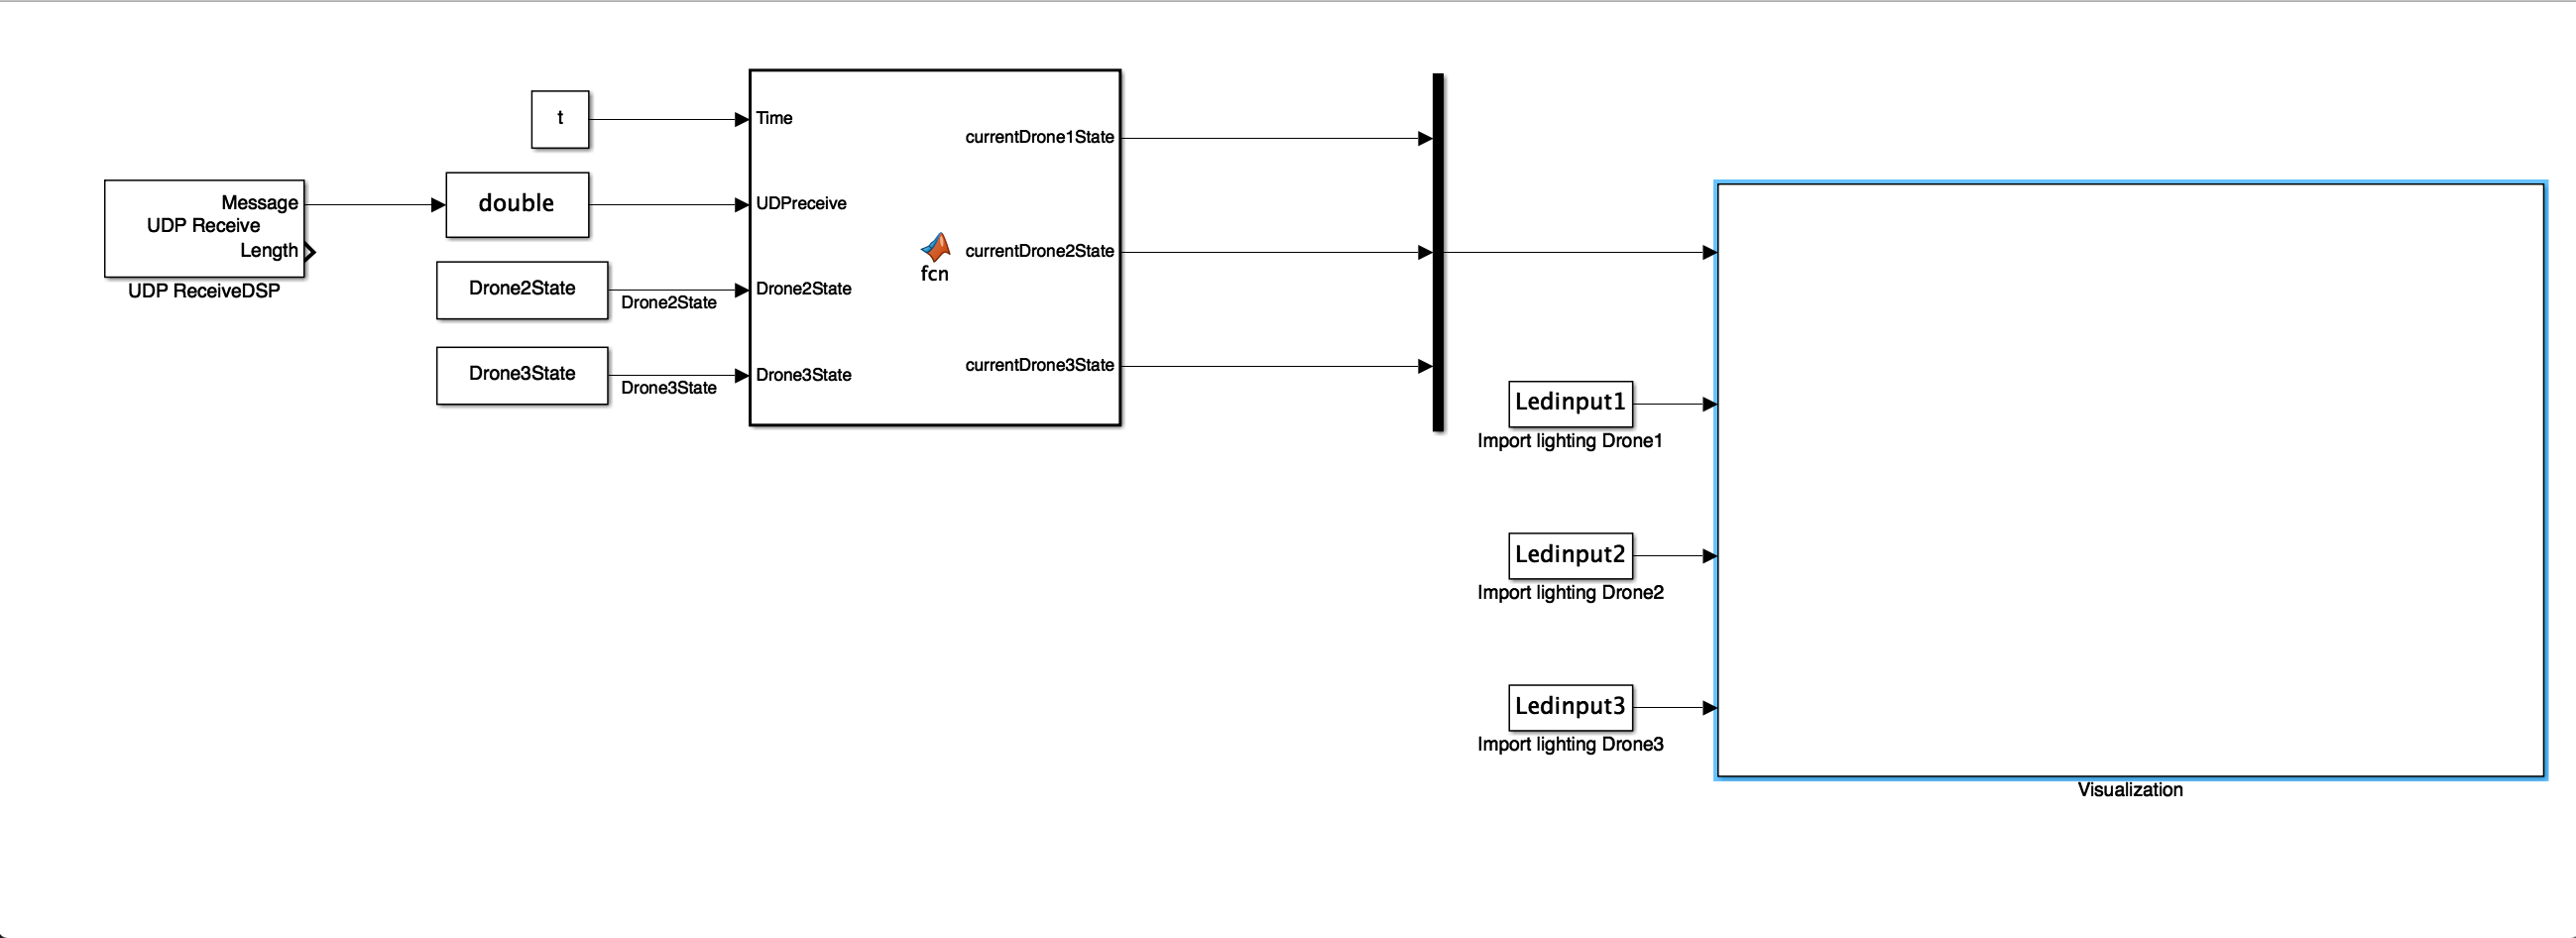
Overview of the Visualization Simulink Model
The VR Sink block for the simulation models is placed in the subsystem called Visualization. This subsystem takes in four inputs, namely a signal that comprises of all the states of the drones and the time vector. And three other signals, each of which contains led input values for a drone.
The matlab function block before the drone states calculates the indexes using the time and timestamps. The timestamp is an index passed by the actual drone, which the corresponding indices for other two drones can be estimated and using these indices the current state of each drone for the simulation can be located. The communication between the simulink model of the drone and the visualization model is done via UDP Communication block of the DSP Toolbox of Simulink. In order to plot the position of the master drone, it is necessary that the three position vectors and the three orientation angles are received via UDP. In addition to these signals, another signal, namely timestamp is also transmitted via UDP.
The led inputs are just data blocks that contain the RGB values corresponding to the LEDs of the drone for each time sample.
Simulink Model
Inside the Visualization subsystem, the received signals are first demuxed into three signals each corresponding to a drone, which is further demuxed into six signals namely 'x', 'y', 'z', 'phi', 'theta' and 'psi'. These values of angles are then converted into world frame which are further converted to the virtual reality frame before they can be fed to the VR Sink block. Before sending these values to the VR Sink block, the translation signals are multiplexed as one 'translation' signal and same is done for the angles, which are multiplexed as 'rotation' signal.
Since, the 'x' and 'y' coordinates of each drone and its shadow are exactly the same, therefore, in addition to connecting the translation signal to the VR Sink block, this signal is also connected to the 'DronePosShadowPos' block which truncates the value of 'z' as the 'z' coordinate of shadow is fixed to the ground. And the output of this is also send to the VR Sink block. This is repeated for all the three drones.
In addition, the leds signals are also fed into the VR Sink block. Each signal consists of colour values of each LED for the whole duration of the show.