Embedded Motion Control 2019 Group 5: Difference between revisions
No edit summary |
No edit summary |
||
| Line 1: | Line 1: | ||
<div style="font-family: 'Roboto','q_serif', Georgia, Times, 'Times New Roman', serif; font-size: | <div style="font-family: 'Roboto','q_serif', Georgia, Times, 'Times New Roman', serif; font-size: 20px;"> | ||
Welcome to the Wiki Page for Group 5 in the Embedded Motion Control Course (4SC020) 2019! | Welcome to the Wiki Page for Group 5 in the Embedded Motion Control Course (4SC020) 2019! | ||
Revision as of 21:14, 20 June 2019
Welcome to the Wiki Page for Group 5 in the Embedded Motion Control Course (4SC020) 2019!
Group Members
| Name | TU/e Number |
|---|---|
| Winston Mendonca | 1369237 |
| Muliang Du | 1279874 |
| Yi Qin | 1328441 |
| Shubham Ghatge | 1316982 |
| Robert Rompelberg | 0905720 |
| Mayukh Samanta | 1327720 |
Introduction
The world around us is changing rapidly. New technological possibilities trigger new ways of life and innovations like self driving cars, medical robots, are prime examples of how technology can not only make life easier but also safer. In this course we look at the development embedded software of autonomous robots, with a focus on semantically modelling real world perception into the robot's functionality to make it robust to environmental variations that are common in real world applications.
In this year's edition of the Embedded Motion Control course, we are required to use Pico, a mobile robot with a fixed range of sensors and actuators, to complete two challenges, namely the Escape Room Challenge and the Hospital Challenge. Our aim was to develop a software structure that give Pico basic functionality that could be easily adapted to both these challenges. The following sections in this page detail out the structure and ideas we used in the development of Pico's software, the strategies designed to tackle the given tasks, and our results from both challenges.
Pico
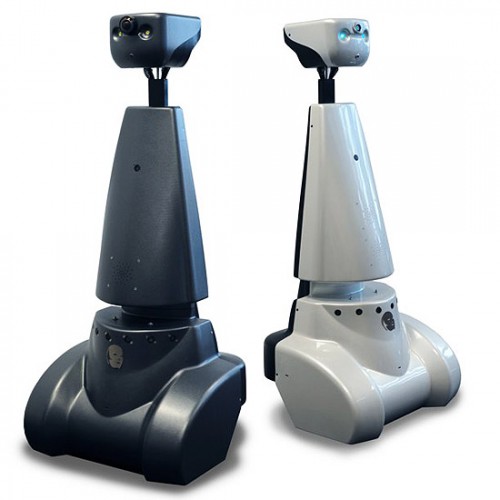
To aptly mirror the structure and operation of a robot deployed in a real-life environment this course uses the Pico robot, a telepresence robot from Aldebaran Robotics. With a fixed hardware platform to work on, all focus can be turned to the software development for the robot. Pico has the following hardware components:
- Sensors/Inputs:
- Proximity measurement with Laser Range Finder (LRF)
- Motion measurement with Wheel encoders (Odometer)
- Control Effort Sensor
- 170-degree wide-angle camera (not used in this course)
- Actuators/Outputs:
- Holonomic Base - Omni wheels that facilitate 2D translation and rotation
- 5" LCD SCreen
- Audio Speaker
- Computer:
- Intel i7 Processor
- OS: Ubuntu 16.04
Functional Requirements for Pico
A description of the expected functionality of robot is the first step to defining its implementation in software in a structured manner. With the given hardware on Pico we were able to define the following functionality for Pico to be able to sufficiently operate in any environment it is placed in:
Generic Requirements
- Pico should be capable of Interpreting (giving real-world meaning) to raw data acquired from its sensors.
- Pico should be capable of Mapping its environment and Localising itself within the mapped environment.
- Pico should be capable of Planning motion trajectories around its environment.
- Pico must adhere to performance and environmental Constraints, such as maximum velocities, maximum idle time while operating, restricted regions, avoiding obstacles, etc.
- Pico should be capable of Providing Information about its operating state and internal process whenever required through the available interfaces.
In addition to these, the following task-specific requirements were defined for Pico (descriptions of the challenges can be found in later sections):
Escape Room Challenge Requirements
- Pico should be capable of identifying an exit and leaving the room from any initial position.
- Pico should use the quickest strategy to exit the room.
- Pico must drive all the way through the exit corridor till the end (past the finish line) to complete the challenge.
Hospital Challenge Requirements
- Pico must be able to accept a dynamic set of objectives (cabinets to visit).
- When Pico visits a cabinet, it should give a clear sound of which cabinet it is visiting (i.e.,“I have visited the cabinet zero”).
- PICO has to make a snapshot of the map once a cabinet is reached.
- PICO should be capable of identifying and working around obstacles and closed doorways while planning its trajectory.
Software Architecture
With the knowledge of the available hardware and the operational requirements for the given tasks, software development can take a well structured and modular developmental approach, thus making it feasible to alter designs and add new functionality at later stages of development. Our software architecture can be split into two parts: the World Model which represents the information system of the robot and the Software Functions which covers all the block that use data from the World Model to give Pico its functionality. While in theory it is encouraged to have a definition of the Information Architecture of system before heading into the Functional Architecture, our software started with the development of a primitive World Model which was later expanded alongside the development of the Software Functions.
World Model
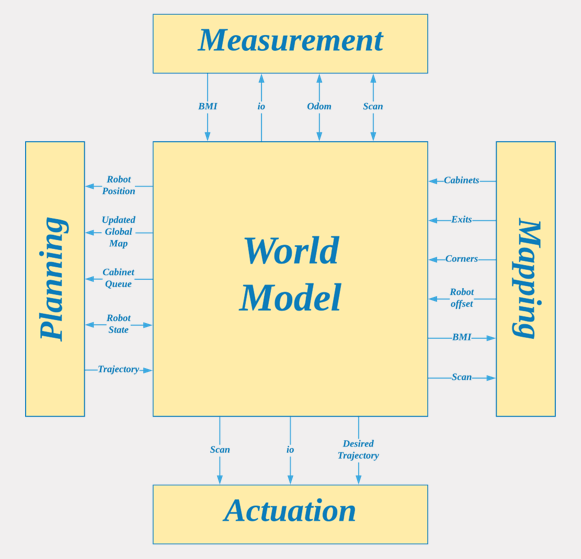
The World Model represents all the data captured and processed by Pico during its operation, and is designed to serve as Pico's real-world semantic "understanding" of its environment. It is created such that software modules only have access to the data required by their respective functions. The data in the World Model can be classified into two sections:
- Environmental Data
- LRF data
- Global Map in the form of Binary Map.
- Corners
- Cabinets
- Exits
- Cabinet Que
- Robot Data
- Robot State
- Robot Position
- Desired Trajectory
- Odometer
- Robot Position
- Robot Offset
Measurement
| Data | Description |
|---|---|
| Scan (LRF Data) | It gets the data from Laser range finder and sends the information to World model which is used later for by measurement function to get BMI information from measurement function. |
| Odom | it gives the data about the rotation done by PICO which is stored in world model and sent to the measurement function. |
| Basic Measurement Information (BMI) | These are the various other information such as the maximum and minimum distances as well as the distance of objects at left, right and center of PICO as well as the angular orientation of Pico with respect to the map. |
Mapping
| Data | Description |
|---|---|
| Scan | It gets the data from Laser range finder and sends the information to World model which is used later for by mapping function to generate local Binary grid map. |
| Corners | Scan data is used by mapping function to generate a list of corner points which are essentially the concave points in the map and is used later used for getting the position of Pico within the map. |
| Exits | these are the convex corner points which are detected as the exit points at a certain room which is used to get out of the room. |
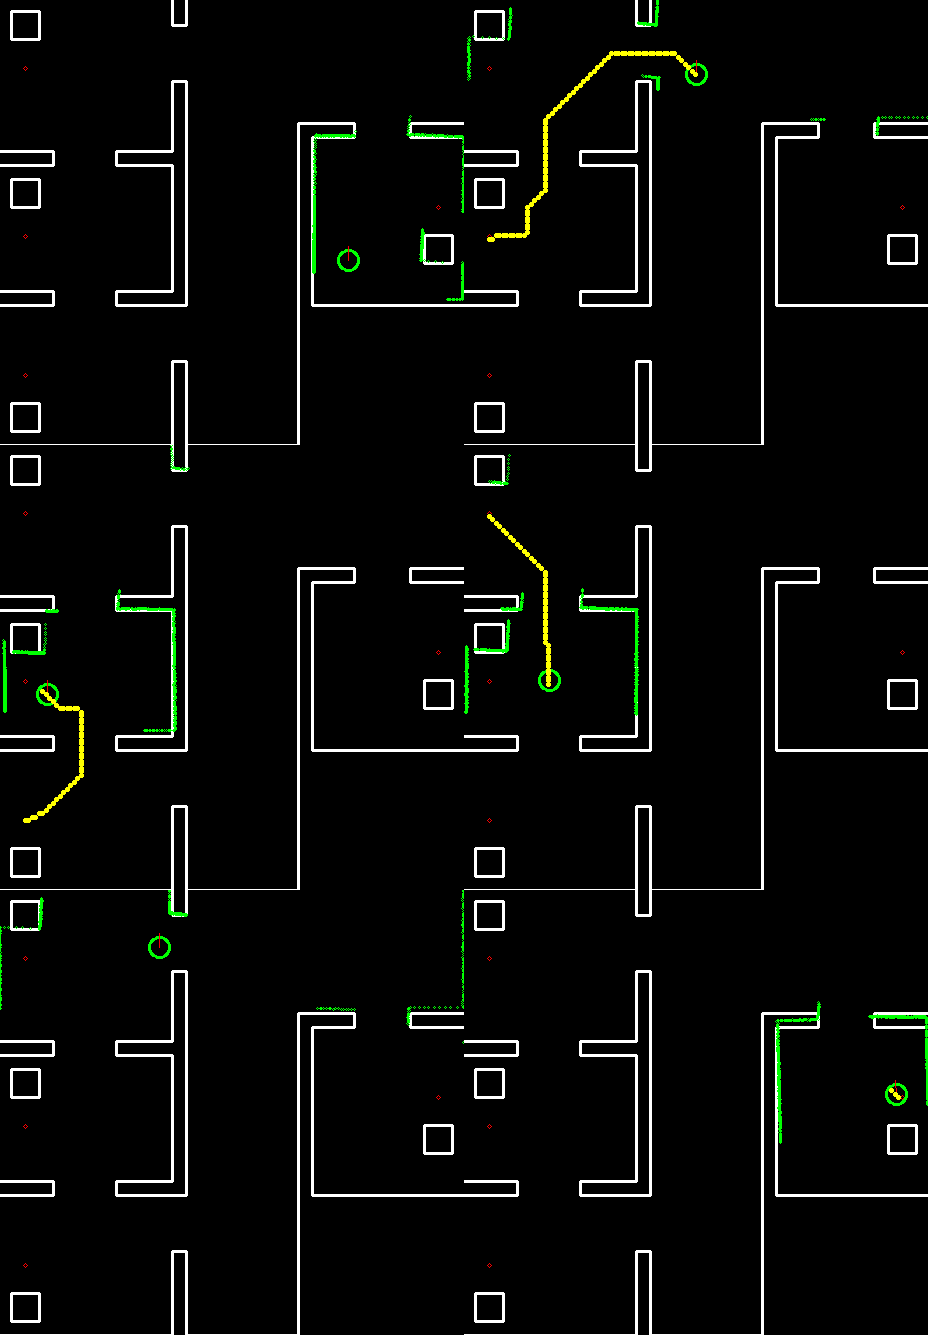
| Localize | this function within the Mapping uses the scan data to create grid map by converting the polar data to Cartesian coordinates and transform that to a local grid map which is used to update the global map and calculate the robot offset. |
| Global Map | the JSON file is used to convert the points to a Global grid map. |
Planning
| Data | Description |
|---|---|
| Trajectory | Based on the robot position information and cabinet list provided by world model the planning module generates the set of the trajectory which is sent to the world model. |
| updated cabinets | The planning module sends back the updated cabinets’ queue list to the world model. |
Actuation
| Data | Description |
|---|---|
| desired trajectory | The desired trajectory data is sent to Actuation which computes the desired X,Y velocity to follow the required trajectory |
Functions
Measurement
The laser range finder present on the PICO is used. This data is received in an array, where the indices contribute to some angle and the value of the second column present the distance to the nearest point in that direction. For calculating the angle range of the PICO is determined during the configuration state. Once this is done, the total angle is divided by the angle increment of the PICO to determine the length of the array and multiplied again to know the angle. From the angle and the radial distance, a set of Cartesian coordinates can be calculated which are used in the localization and planning parts.
In the function part named 'measurement', different return values are designed to determine states of reading the data received by PICO, including laser data and odometry data. Then, the middle interval of the whole scanning range of PICO is defined as its front center index and the direction of the interval pointed by 90°/-90° with respect to the front center index is defined as left/right index. The farthest distance and the nearest distance which could be detected are recorded and updated in the model 'getMaxMinDist'. In addition, environment states (existing obstacles or not) of three directions (front, left and right direction of PICO) are also processed and updated in this model. In the model 'sectorClear', four return values are defined to express different states faced by PICO directly which show the distance between PICO and obstacles. The next model in measurement is 'alignedToWall', compare the distance ***. Moreover, angle increment, maximal angle and minimal angle are also recorded in this function.
Mapping
Planning
Actuation
Additional Functions
The main functions are aided by some other necessary functions which are as follows:
1. Data logging: The function helps to store the LRF data during the simulation process which could be used to understand how PICO sees the area around itself.
2. Polar to cartesian conversion: The raw LRF data is in polar form. This function is converts the LRF readings to cartesian coordiantes for creating a grid with a specific resolution.
3. Json to Binary map: The function is used to create a binary map with walls represented as one's and empty region as zeros.
4. Padding walls: Since the Astar algorithm algorithm tries to find the shortest possible path, there are chances that it could create a path brushing the walls. This would result PICO getting too close to the wall which is undesired. This function makes a wighted padding with the walls getting the highest weights.
5. Astar: This function computes a path from the current position of PICO to the goal point which are positioned near each cabinet.
6. Distance calculation: The function calculates the distance between any two points in the grid map.
Escape Room Challenge
Link to Challenge Description
The main objective of PICO is to be able exit the room from any given starting position without bumping into the walls within 10 minutes. The detailed description for the Escape Room Competition could be found here.
Challenge Strategy
Initial stage in the strategy is to scan the room and search for the exit. If the exit is not found PICO will continue to rotate until it manages to find an exit. If still the exit is not detected then PICO will move approximately to the center of the room and rescan the room for an exit. This case was put in when it was observed during test runs that PICO does not manage to identify the exit if the initial position was parallel to the wall containing the exit Once the exit is found Pico will move towards the center of the exit. As soon as the exit is reached, adjustments so PICO orients the corridor. Once that is done, PICO will start to follow the corridor until it detects no corridors around itself.
End Result and Future Improvements
In the first attempt PICO slightly bumped into the wall while entering the corridor due to oscillatory movement and high velocity during diagonal movement. In the second round the maximum transnational velocity was reduced which helped it to enter the corridor smoothly. The challenge was completed in 40 seconds. Eventually our group managed to win the completion and we got some beers at the end of the final competition for the same!
Hospital Challenge
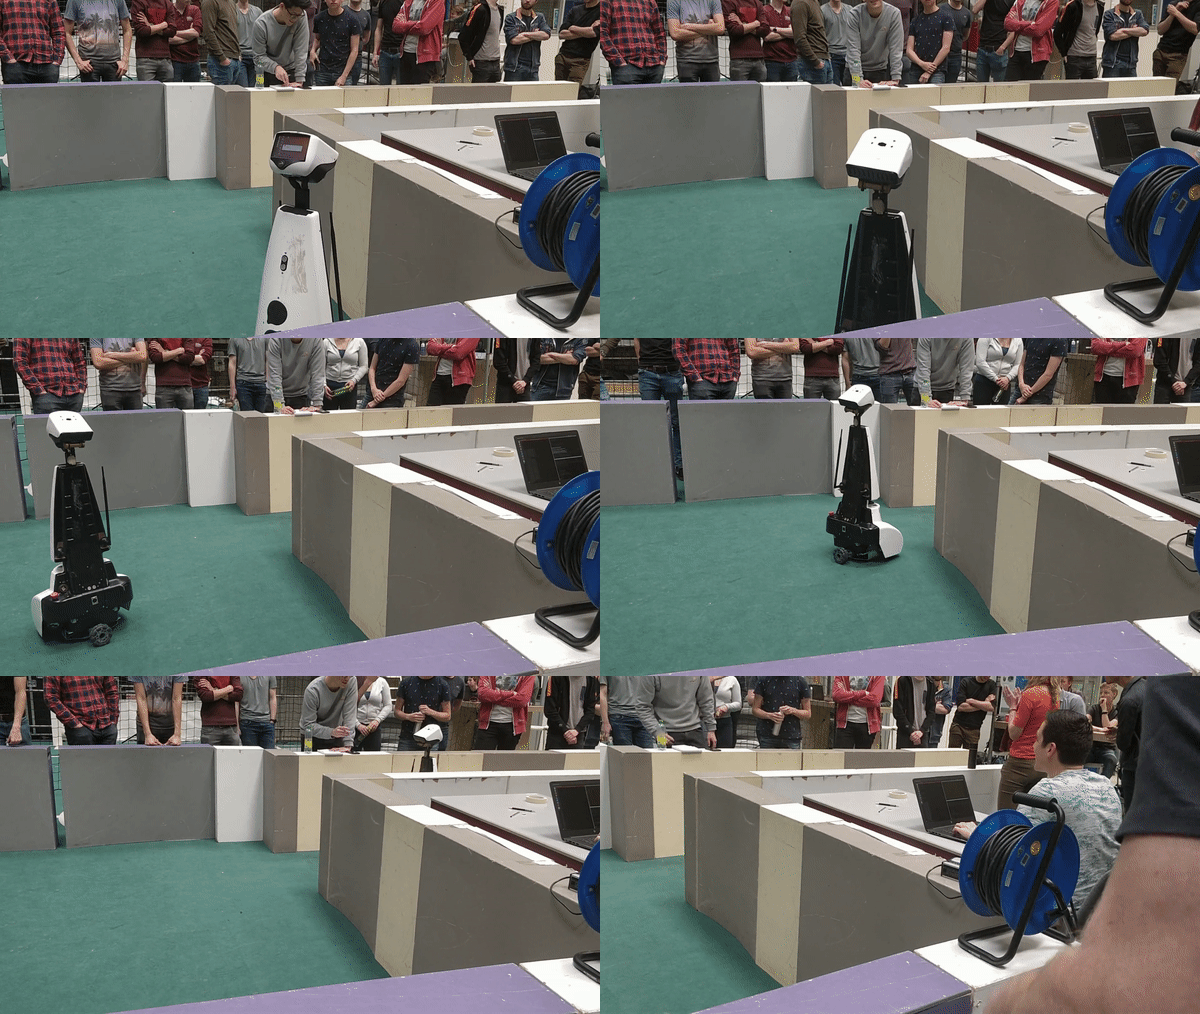
Hospital Competition is the second part of the course Embedded Motion Control. In this competition, PICO could determine the cabinet in each room and face towards all the cabinets in the right region marked previously for the given start area. When PICO visits a cabinet, it should give a clear sound of which cabinet it is visiting (i.e., “I have visited the cabinet zero”) and reach all the cabinets with a correct order. PICO could detect the obstacles in this competition not only static objects but also dynamic ones (Such as the walking actor in the hallway) and not hit any walls and objects except for slightly touching. PICO should also try to detect the static and dynamic objects and present them in its own world model. Finally, PICO should complete the task within 10 minutes and must not remain idle for more than 30 seconds. This is a brief presentation slide with a basic introduction of Hospital Competition, which could be found here
Link to Challenge Description
The detailed description for the Hospital Competition could be found here.
Challenge Strategy
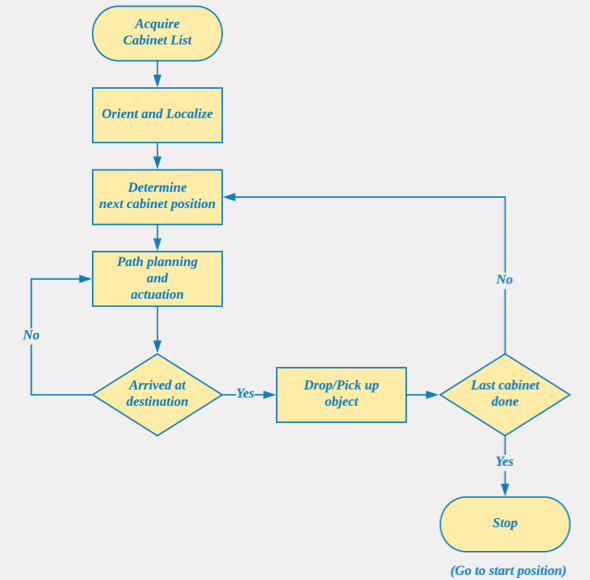
State Diagram
End Result and Future Improvements
Initial Design of Escape Room Competition
A brief summary of embedded software functions design is described in the following chapters.
Design Document
The Initial Design Plan for the Escape Room Competition and the Hospital Competition with PICO could be found here.
Functions
| Function | Description | |
|---|---|---|
| High-level | Detect Wall | Set a safe distance between wall and PICO. If there are too closer with each other, PICO would execute corresponding movements. |
| Detect Corner | Detect the number of corners of the room. | |
| Startup | Identity the initial angle of PICO in the start position. And then, compute an angle -- θ. | |
| Scan for Exit | Rotate PICO to detect all the distances between wall and robot in order to find the exact position of the corridor. | |
| Move to Max | If PICO do not detect enough walls in the room, it will move to the direction of the maximal distance and detect walls again. | |
| Face Exit | Let PICO face to the exit corridor straightly but not perfectly. PICO would not rotate itself in a defined error range. | |
| Drive to Exit | PICO moves to the exit. | |
| Enter Exit Corridor | Enter the exit corridor with a safe range between the walls of the corridor and PICO itself. | |
| Follow Corridor | Follow the walls of the corridor with a safe range until PICO crosses the finish line. | |
| Low-level | Initialize | Initialize actuators |
| Read Data of Sensors | Read the odometer and laser data | |
| Drive Forward | Move straightly | |
| Drive Backward | Move back | |
| Drive Left | Move left | |
| Drive Right | Move right | |
| Turn Left | Turn 90°left | |
| Turn Right | Turn 90°right | |
| Turn Around | Rotate | |
| Stop Movement | Stop current movement. |
Escape Room Challenge Execution
- Introductions about functions of code. Explain each mode more or less in order to let readers know what happened in our PICO. Just like what Winston did in Tuesday evening. -- YI
Startup
This mode involves computing the required angle for PICO to complete a full 360 degree view if needed. Once the angle has been determined the state switches to SCAN_FOR_EXIT.
Scan for exit
This mode searches for an exit in its available field of view which is around 230 degrees. If it does not manage to find an exit in this field of view, it uses the angle computed in the STARTUP to complete to rotate until it manages to find the exit. If it happens to be the case that it still did not manage to find any exit it switches to a state MOVE_TO_MAX. This scenario is generally encountered if PICO is initially put in a corner adjacent to the exit wall.
Move to max
Face exit
Exit undetectable
Orient to exit wall
Drive to exit
Enter exit corridor
Exit corridor follow
Stop
Hospital Competition
The main objective for PICO is to "deliver" the medicines from one cabinet to another which will be defined by the judges just before the challenge starts. The PICO will be operating under an environment amidst static and dynamic obstacles.
Software architecture
The main components of our architecture are the world model, the planning, the mapping, the measurement and actuation parts. The world model contains all the data of the environment and data like the position of the robot. The mapping module ensures the world model is updated and a map is provided. The planning ensures a path is planned from the current position of the robot towards a certain goal. The measurement part feeds data and some basic information into the word model and the actuation ensures the robot actually moves. These components will be worked out in more detail below.
World model
The world model contains all the data of the environment and the robot like its position. From the world model information is sent towards the other blocks, which process them and provide new information to the world map.
State machine
Measurement
For the measurements the laser range finder present on the PICO is used. This data is received in an array, where the indices contribute to some angle and the value of the second column present the distance to the nearest point in that direction. For calculating the angle the range of the PICO is determined during the configuration state. Once this is done, the total angle is divided by the angle increment of the PICO to determine the length of the array and multiplied again to know the angle. From the angle and the radial distance a set of Cartesian coordinates can be calculated which are used in the localization and planning parts.
Planning
To be able to plan a path the A* algorithm is used.
Mapping
we create two types of map
1.Global map.
2.Local Map
Global Map
In order to implement the A* path planning algorithm, the given map, which is in the form of a json file, is converted into a binary map. The objects of the map is given based on points with x and y coordinates. The walls and cabinets are described with lines, where the lines are defined by the start point and end point.
The first step to build the binary map is to find the range of the map. Therefore,
This is created using the Json file , which contains the x,y coordinates of the points which make up the wall and cabinates.
Using the x,y coordinates of the points we create the binary map made up of 1's and 0's where 1's represent any sort of obstacle such as walls or cabinates.
Local Map
This is created from the laser data provided the LRF .
We convert the LRF data to cartesian cordinates which in turn is used to convert it to binary map made up of 1's and 0's.
This map is used to identify any sorts of unknown structure which can be added to the global map for path planning.
Actuation
Interfaces
1. Console
2. Captured images
3. io.speak()
4. Log files
Results
Improvements
During the project the implementation ideas changed a lot. It is advisable to come to an agreement of the final implementation as soon as possible.
